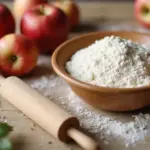
Baking has a way of bringing comfort and joy into our lives, especially when the aroma of freshly baked pies fills the air. I created this post because I know how easy it can be to feel overwhelmed in the kitchen, especially when you want to whip up something delicious without spending all day doing it. That’s where Pillsbury pie crust comes in. It’s a game changer that makes baking feel effortless.
If you’re someone who loves to bake but struggles with the prep work, you’re in the right place. This collection of recipes is perfect for busy families, novice bakers, or anyone who simply wants to enjoy homemade treats without the fuss. Whether it’s a last-minute dessert for guests or a cozy pie for a quiet night in, these recipes will speak to your love for comfort food.
You’ll find 26 creative ways to use Pillsbury pie crust that are not only quick but also full of flavor. From sweet fruit pies to savory quiches, there’s something here for everyone. Each recipe is designed to be simple and satisfying, giving you the chance to impress your family and friends without breaking a sweat. Get ready to dive into a world of effortless baking that will leave you craving more while keeping your kitchen stress-free!
1. Classic Apple Pie with a Twist

Craving a slice of warm apple pie? You’re in luck! With Pillsbury pie crust, you can whip up this classic dessert in no time. This recipe adds a delightful twist with a sprinkle of cinnamon and nutmeg, creating that comforting aroma that fills your kitchen.
Imagine biting into a slice of pie filled with tender apples, perfectly spiced to perfection. It’s a family favorite that not only satisfies your sweet tooth but also invites creativity. You can even add raisins or a drizzle of caramel for an extra surprise. Let’s dive into how you can make this scrumptious dish at home.
Recipe Overview
– Servings: 8
– Prep Time: 20 minutes
– Cook Time: 45 minutes
– Total Time: 1 hour 5 minutes
– Calories: 300 per slice
Nutrition Information
– Total Fat: 14g
– Saturated Fat: 7g
– Carbohydrates: 42g
– Protein: 3g
Ingredients
– 2 Pillsbury pie crusts
– 6 cups sliced apples (Granny Smith or Honeycrisp work best)
– ¾ cup sugar
– 2 tablespoons flour
– 1 teaspoon cinnamon
– ¼ teaspoon nutmeg
– 1 tablespoon lemon juice
– 1 egg (for egg wash)
Instructions
1. Preheat your oven to 425°F (220°C).
2. In a large bowl, mix the sliced apples, sugar, flour, cinnamon, nutmeg, and lemon juice. Toss everything until well-coated.
3. Roll out one pie crust and fit it into a 9-inch pie pan.
4. Fill the crust with your apple mixture.
5. Roll out the second crust and place it on top, either as a lattice or a full cover.
6. Brush the top crust with the beaten egg to achieve a golden finish.
7. Bake for 45 minutes, or until the apples are bubbly and the crust is golden brown.
This pie is perfect for gatherings or cozy nights at home. Just remember to let it cool before slicing for the best results.
Frequently Asked Questions
– Can I use frozen apples?
Yes, just ensure they are thawed and drained.
– How do I store leftovers?
Keep it covered in the fridge for up to 3 days.
Enjoy your baking adventure! This classic apple pie will surely become a favorite in your household.
Classic Apple Pie with a Twist
Editor’s Choice


GoodCook Everyday Nonstick Steel Pie Pan , 9″, Gray
2. Decadent Chocolate Cream Pie

Treat yourself to a delightful experience with a Decadent Chocolate Cream Pie that’s both creamy and satisfying. Using Pillsbury pie crust makes this treat a breeze to prepare. Whether you’re celebrating a special occasion or just satisfying a chocolate craving, this pie is sure to please.
Imagine slicing into a rich pie filled with velvety chocolate goodness. Each bite melts in your mouth, offering a perfect balance of sweetness and chocolate depth. Chill it in the fridge for a refreshing dessert that everyone will love.
Here’s how to make it:
Recipe Overview
– Servings: 8
– Prep Time: 20 minutes
– Cook Time: 25 minutes
– Total Time: 45 minutes
– Calories: 350 per slice
Nutrition Information
– Total Fat: 20g
– Saturated Fat: 10g
– Carbohydrates: 40g
– Protein: 5g
Ingredients
– 1 Pillsbury pie crust
– 1 ½ cups heavy cream
– 1 cup semisweet chocolate chips
– 2 eggs
– ½ cup sugar
– 1 tsp vanilla extract
– Whipped cream (for topping)
Instructions
1. Preheat your oven to 350°F (175°C).
2. Bake the pie crust for about 25 minutes until it’s golden brown.
3. In a saucepan, warm 1 cup of heavy cream. Stir in the chocolate chips until they melt completely.
4. In a separate bowl, whisk together the eggs and sugar. Gradually add the melted chocolate mixture.
5. Pour this rich filling into the baked pie crust and return it to the oven for another 15 minutes.
6. Once done, let it cool before refrigerating for a few hours.
7. Serve chilled and top with whipped cream for an extra touch of sweetness.
This pie can be made ahead of time, making it perfect for gatherings. If you want to elevate the flavors, consider using dark chocolate for a more intense taste. A sprinkle of sea salt on top adds a gourmet touch that will impress your guests.
Frequently Asked Questions
– Can I make this ahead of time?
Yes! It stores well in the fridge for a few days.
– Can I make it gluten-free?
Simply opt for a gluten-free pie crust instead. Enjoy your delicious creation!
Decadent Chocolate Cream Pie
Editor’s Choice

Premade Refrigerated Pie Crust, Two Pie Crusts, 14.1 oz
3. Berry Galette for Fresh Flavors

A berry galette is your go-to dessert for summer gatherings. It’s simple yet stunning, showcasing fresh berries and a flaky Pillsbury pie crust. This rustic treat not only looks impressive but also tastes divine, making it a favorite at picnics and barbecues. Imagine the burst of sweet and tangy flavors with each bite, complemented by the buttery crust. You can easily customize it with whatever berries are in season or even mix in some stone fruits for a twist.
Recipe Overview
– Servings: 6
– Prep Time: 15 minutes
– Cook Time: 30 minutes
– Total Time: 45 minutes
– Calories: 250 per slice
Nutrition Information
– Total Fat: 10g
– Saturated Fat: 5g
– Carbohydrates: 35g
– Protein: 3g
Ingredients
– 1 Pillsbury pie crust
– 2 cups mixed berries (choose strawberries, blueberries, raspberries)
– ¼ cup sugar
– 1 tbsp cornstarch
– 1 tbsp lemon juice
– 1 egg (for egg wash)
Instructions
1. Preheat your oven to 375°F (190°C).
2. In a bowl, mix the berries, sugar, cornstarch, and lemon juice. Let it sit.
3. Roll the pie crust into a large circle on parchment paper.
4. Spoon the berry mixture into the center, leaving a 2-inch border.
5. Fold the edges of the crust over the berries, creating pleats as you go.
6. Brush the folded crust with the beaten egg for a golden finish.
7. Bake for 30 minutes or until the crust is golden brown.
The beauty of a galette is its versatility. You can swap out the berries for any fruit you prefer, making it a year-round delight. Pair it with a scoop of vanilla ice cream for an extra special treat.
Frequently Asked Questions
– Can I use frozen berries?
Yes, just make sure they are thawed and well-drained.
– How should I store leftovers?
Cover and keep it in the fridge for up to 2-3 days.
This easy berry galette will impress your friends and family, giving you more time to enjoy the summer sun. Enjoy baking and indulging in this delightful dessert!
Berry Galette for Fresh Flavors
Editor’s Choice

Pie Crust Mix, Makes Two 9-inch Crusts, 11 oz. (Pack of 12)

26×16 Inch Extra Thick Silicone Baking Mat with Measurements, Non-slip a…

Tovolo Mini Berry Melamine Colander (Cayenne) – Small Food Strainer for …
4. Lemon Meringue Pie Made Easy

Make your dessert table shine with a refreshing Lemon Meringue Pie that’s simpler than you think! Using Pillsbury pie crust means you can focus on the delicious filling and fluffy meringue. The zesty lemon flavor paired with a soft meringue topping creates a delightful treat that will impress your friends and family.
Recipe Overview
– Servings: 8
– Prep Time: 15 minutes
– Cook Time: 35 minutes
– Total Time: 50 minutes
– Calories: 320 per slice
Nutrition Information
– Total Fat: 12g
– Saturated Fat: 4g
– Carbohydrates: 47g
– Protein: 5g
Ingredients
– 1 Pillsbury pie crust
– 1 cup sugar
– 2 tablespoons cornstarch
– 1 cup water
– 3 egg yolks
– 1/4 cup lemon juice
– 2 tablespoons butter
– 3 egg whites
– 1/4 teaspoon cream of tartar
Instructions
1. Preheat your oven to 350°F (175°C).
2. Roll out the Pillsbury pie crust and bake it for 10 minutes until it’s lightly golden.
3. In a saucepan, mix together sugar, cornstarch, and water. Stir until it boils.
4. In a separate bowl, whisk together egg yolks and lemon juice, then slowly mix in the hot mixture. Cook this until it thickens.
5. Pour the lemon filling into your baked crust.
6. In another bowl, beat egg whites and cream of tartar until stiff peaks form. Spread this fluffy meringue over the lemon filling.
7. Bake for an additional 15 minutes until the meringue is golden brown.
This pie is perfect for summer gatherings or any occasion when you want a light, tangy dessert. For an extra twist, try adding a splash of lime juice or some zest to the lemon filling.
Frequently Asked Questions
– How do I prevent the meringue from weeping?
Make sure to spread the meringue over the hot lemon filling right away.
– Can I prepare it in advance?
It’s best enjoyed fresh, but you can make the crust and filling ahead of time.
Enjoy this deliciously easy Lemon Meringue Pie, and watch your loved ones smile with every slice!
5. Peach Cobbler in a Hurry

If you’re yearning for a delicious dessert that warms your heart, look no further than this quick peach cobbler! Using a Pillsbury pie crust, this recipe is simple and satisfying. Rich, juicy peaches mingle with a flaky crust to create the ultimate comfort food. Perfect for cozy evenings or family get-togethers, this dessert brings everyone to the table.
Here’s a quick overview of what you’ll need to make this delightful dessert:
Recipe Overview
– Servings: 6
– Prep Time: 10 minutes
– Cook Time: 35 minutes
– Total Time: 45 minutes
– Calories: 280 per serving
Nutrition Information
– Total Fat: 12g
– Saturated Fat: 6g
– Carbohydrates: 39g
– Protein: 3g
Ingredients
– 1 Pillsbury pie crust
– 4 cups sliced peaches (fresh or canned)
– ½ cup sugar
– 2 tbsp flour
– 1 tsp cinnamon
– 1 tbsp lemon juice
Instructions
1. Preheat your oven to 375°F (190°C). This step is crucial for a perfectly baked cobbler!
2. In a mixing bowl, combine the sliced peaches, sugar, flour, cinnamon, and lemon juice. Toss until everything is well mixed. The lemon juice brightens the flavors!
3. Lay the Pillsbury pie crust in a baking dish and pour the peach filling on top. The crust will hold all that deliciousness in!
4. For a rustic touch, fold any excess crust over the edges. This adds character to your cobbler.
5. Bake for 35 minutes or until the top is bubbly and golden brown. Your kitchen will smell heavenly!
This peach cobbler is not just a treat on its own; it pairs beautifully with a scoop of vanilla ice cream. Feel free to swap out the peaches for other fruits like cherries or blackberries, depending on what you have on hand. It’s a flexible recipe that adapts to your taste.
Frequently Asked Questions
– Can I use frozen peaches?
Yes! Just thaw them first and drain any excess moisture. This keeps your cobbler from getting soggy.
– How long does it last in the fridge?
Enjoy it within 3 days for the best taste. Store it in a covered container to keep it fresh.
This simple recipe will surely become a favorite in your home. Happy baking!
Peach Cobbler in a Hurry
Editor’s Choice
Pillsbury Premade Refrigerated Pie Crust, Two Pie Crusts, 14.1 oz

Simply Organic Ceylon Ground Cinnamon, 2.08 Ounce, Non-GMO Organic Cinna…

AussieBlends Premium Vanilla Ice Cream Mix For Soft Serve, Rolled Ice Cr…
6. Mini Quiches for a Savory Snack

Turn your Pillsbury pie crust into a savory delight with mini quiches! These bite-sized treats are not just for dessert; they make a perfect addition to brunch or a fantastic appetizer for gatherings. With their rich flavors and simple preparation, you’ll impress your guests without breaking a sweat.
Imagine a warm, cheesy quiche filled with your favorite ingredients. You can customize these to fit any taste. Whether you prefer crispy bacon, fresh spinach, or a mix of colorful veggies, the options are endless. Plus, they’re just as delicious served cold, making them ideal for meal prep or picnics!
Recipe Overview
– Servings: 12 mini quiches
– Prep Time: 15 minutes
– Cook Time: 20 minutes
– Total Time: 35 minutes
– Calories: 150 per quiche
Nutrition Information
– Total Fat: 9g
– Saturated Fat: 3g
– Carbohydrates: 12g
– Protein: 6g
Ingredients
– 1 Pillsbury pie crust
– 6 eggs
– 1 cup shredded cheese (your choice)
– ½ cup cooked bacon or spinach
– 1 cup milk
– Salt and pepper to taste
Instructions
1. Preheat your oven to 375°F (190°C).
2. Roll out the pie crust and cut it into circles that fit a muffin tin.
3. In a bowl, whisk together the eggs, milk, salt, and pepper until well combined.
4. Place your choice of cooked bacon or spinach in each pie crust circle.
5. Pour the egg mixture over the fillings until each is nearly full.
6. Top with shredded cheese and bake for about 20 minutes, or until the quiches are set and lightly golden.
These mini quiches are not only easy to make but also a great way to use up leftover ingredients. You can swap the fillings based on what you have on hand. Enjoy them fresh out of the oven or store them in an airtight container in the fridge for up to three days.
Frequently Asked Questions
– Can I use egg substitutes?
Absolutely! Feel free to use your favorite egg alternative.
– How do I store leftovers?
Keep them in an airtight container in the fridge for up to 3 days.
Try these mini quiches for your next gathering, and watch them disappear in no time!
Mini Quiches for a Savory Snack
Editor’s Choice

Amazon Basics Nonstick Round Muffin Baking Pan, 12 Cups, Set of 2, Gray,…

Amazon Basics Silicone Rectangular Baking Mat, Non-Stick Reusable Oven B…

NileHome Stainless Steel Whisk Set 8″ 10″ 12″ Kitchen Whisk Balloon Whis…
7. Nutty Chocolate Pie

Indulge in the delightful combination of rich chocolate and crunchy nuts with this Nutty Chocolate Pie. This dessert is not just any pie; it’s a celebration of flavors that will impress your family and friends. With a Pillsbury pie crust as your foundation, this recipe makes baking a breeze and adds a touch of elegance to any gathering.
Imagine slicing into a warm pie, the smooth chocolate filling mingling with the satisfying crunch of nuts. This treat is perfect for any chocolate lover and is surprisingly simple to make. Plus, you can easily customize it with your favorite nuts for added flair.
Recipe Overview
– Servings: 8
– Prep Time: 15 minutes
– Cook Time: 30 minutes
– Total Time: 45 minutes
– Calories: 400 per slice
Nutrition Information
– Total Fat: 24g
– Saturated Fat: 10g
– Carbohydrates: 40g
– Protein: 7g
Ingredients
– 1 Pillsbury pie crust
– 1 cup chocolate chips
– ½ cup chopped nuts (pecans, walnuts, or your choice)
– 1 cup heavy cream
– ¼ cup sugar
– 2 eggs
Instructions
1. Preheat your oven to 350°F (175°C).
2. Place the pie crust in the oven and bake for 10 minutes until it’s golden brown.
3. In a mixing bowl, beat the eggs and sugar together until fluffy.
4. Stir in the melted chocolate, heavy cream, and chopped nuts. Pour this mixture into the baked pie crust.
5. Bake for an additional 30 minutes, or until the filling is set.
Serve this pie with a dollop of lightly whipped cream on top for an extra treat. You can even try different nuts like almonds or hazelnuts to find your favorite combination. This Nutty Chocolate Pie is sure to become a beloved dessert at your table!
Frequently Asked Questions
– Can I make it without the nuts?
Yes, you can simply leave them out for a classic chocolate pie.
– How do I store leftovers?
Keep it covered in the fridge for up to 4 days.
Now, you have a delicious recipe to impress everyone and enjoy. Happy baking!
Nutty Chocolate Pie
Editor’s Choice

King Arthur Flour Gluten Free Pie Crust Mix, Packaging May Vary, 14 Oz

GHIRARDELLI Semi-Sweet Chocolate Premium Baking Chips, Chocolate Chips f…

8. Pumpkin Cheesecake Bars

Imagine biting into a creamy pumpkin cheesecake bar with a flaky, buttery crust. These delightful treats combine the rich flavors of pumpkin and cream cheese, making them an ideal dessert for any fall gathering or cozy night in. Plus, with Pillsbury pie crust, you can whip them up with minimal effort and maximum flavor.
Recipe Overview
– Servings: 12
– Prep Time: 15 minutes
– Cook Time: 40 minutes
– Total Time: 55 minutes
– Calories: 250 per bar
Nutrition Information
– Total Fat: 15g
– Saturated Fat: 9g
– Carbohydrates: 27g
– Protein: 4g
Ingredients
– 1 Pillsbury pie crust
– 2 cups pumpkin puree
– 1 cup cream cheese, softened
– ¾ cup sugar
– 2 large eggs
– 1 tsp vanilla extract
– 1 tsp pumpkin spice
Instructions
1. Preheat your oven to 350°F (175°C).
2. Roll out the Pillsbury pie crust and place it in a greased 9×13-inch baking dish, pressing down gently.
3. In a mixing bowl, blend the pumpkin puree, cream cheese, sugar, eggs, vanilla, and pumpkin spice until smooth and creamy.
4. Pour this luscious filling over the crust, spreading it evenly.
5. Bake in the preheated oven for 40 minutes or until set. Allow the bars to cool completely before slicing.
These pumpkin cheesecake bars are not just tasty; they’re also easy to prepare in advance. You can take them to a potluck, a family dinner, or enjoy them as a sweet treat after a long day. For a special twist, try drizzling caramel sauce on top or sprinkle some chopped pecans for that extra crunch.
Frequently Asked Questions
– Can I use fresh pumpkin?
Yes, just make sure it’s well-pureed to get a smooth texture.
– How should I store these bars?
Keep them in an airtight container in the fridge, and they’ll stay fresh for up to a week.
Pumpkin Cheesecake Bars
Editor’s Choice
Pillsbury Premade Refrigerated Pie Crust, Two Pie Crusts, 14.1 oz

Farmer’s Market Organic Pumpkin Puree, 15 Ounce (Pack of 12 Cans)

Good Culture Organic Classic Cottage Cheese, 16 oz
9. S’mores Galore Pie

Imagine bringing the delightful taste of campfire s’mores right into your kitchen with a S’mores Galore Pie! This easy dessert features a buttery Pillsbury pie crust filled with rich chocolate, fluffy marshmallows, and crunchy graham crackers. It’s a sweet treat that combines nostalgia with simplicity, making it perfect for any gathering.
In just about 50 minutes, you’ll have a delicious pie that serves eight. Each slice packs a punch with around 350 calories. This dessert is not only quick to prepare but also a crowd-pleaser for both kids and adults. The blend of textures and flavors makes every bite a heavenly experience.
Recipe Overview
– Servings: 8
– Prep Time: 20 minutes
– Cook Time: 30 minutes
– Total Time: 50 minutes
– Calories: 350 per slice
Nutrition Information
– Total Fat: 16g
– Saturated Fat: 8g
– Carbohydrates: 48g
– Protein: 4g
Ingredients
– 1 Pillsbury pie crust
– 1 cup chocolate chips
– 1 cup mini marshmallows
– ½ cup graham cracker crumbs
– ½ cup sugar
– 2 tbsp butter (melted)
Instructions
1. Preheat your oven to 350°F (175°C).
2. Roll out the Pillsbury pie crust and fit it into your pie dish.
3. In a mixing bowl, combine the chocolate chips, sugar, and melted butter.
4. Spread this chocolate mixture evenly over the crust.
5. Top it off with graham cracker crumbs and mini marshmallows.
6. Bake for 30 minutes, or until the marshmallows turn a lovely golden brown.
This S’mores Galore Pie simplifies your s’mores cravings. You can whip it up for a cozy family night or impress friends at a potluck. Store any leftovers in the fridge for up to three days. Just remember, you can also use homemade graham cracker crumbs if you have them!
• Take your pie to the next level with homemade graham cracker crumbs.
• Store leftovers covered in the fridge for up to 3 days.
• Serve with a scoop of vanilla ice cream for an extra treat.
• Get creative and add peanut butter chips for a twist.
Dive into this tasty treat today, and enjoy the sweet memories it creates!
S’mores Galore Pie
Editor’s Choice

Pillsbury Easy as Pie: 140 Simple Recipes + 1 Readymade Pie Crust = Swee…

365 by Whole Foods Market, Semi-Sweet Chocolate Baking Chips, 12 Ounce

10. Coconut Cream Pie Surprise

Imagine a dessert that whisks you away to a sun-soaked beach. The Coconut Cream Pie Surprise does just that! With a flaky Pillsbury pie crust cradling a creamy coconut filling, this pie is like a tropical vacation on your plate. Topped with fluffy whipped cream and toasted coconut, it’s both delightful and stunning.
Here’s how to make this mouthwatering treat:
Recipe Overview
– Servings: 8
– Prep Time: 20 minutes
– Cook Time: 30 minutes
– Total Time: 50 minutes
– Calories: 300 per slice
Nutrition Information
– Total Fat: 18g
– Saturated Fat: 12g
– Carbohydrates: 34g
– Protein: 3g
Ingredients
– 1 Pillsbury pie crust
– 1 ½ cups coconut milk
– 1 cup heavy cream
– ¾ cup sugar
– 4 large eggs
– 1 cup shredded coconut
Instructions
1. Preheat your oven to 350°F (175°C).
2. Roll out your Pillsbury pie crust and place it in a pie dish. Bake for about 10 minutes until it turns lightly golden.
3. In a saucepan, mix coconut milk, sugar, and shredded coconut. Heat gently until warm.
4. In a bowl, whisk the eggs. Slowly add the warm coconut mixture to the eggs, whisking continuously to avoid scrambling.
5. Pour this luscious filling into your baked crust and return it to the oven. Bake for 30 minutes or until set.
6. Let it cool, then top with whipped cream and sprinkle toasted coconut for an extra crunch.
This pie is perfect for summer gatherings or any time you crave a taste of the tropics. Want to amplify the flavor? Add a splash of rum extract to the filling.
Frequently Asked Questions:
– Can I use light coconut milk?
Yes, but be aware it may change the creaminess slightly.
– How do I store leftovers?
Keep it covered in the fridge for up to 4 days.
With this recipe, you’ll have a dessert that not only tastes amazing but also creates lasting memories. Enjoy every bite!
Coconut Cream Pie Surprise
Editor’s Choice

Adjustable Silicone Pie Crust Shields – Baking Protectors Cover Pie Edge…

Simply Asia Unsweetened Coconut Milk, 13.66 fl oz – One 13.66 Ounce Can …

Organic Valley, Cream Heavy Whipping Ultra-Pasturized Organic, 16 Fl Oz
11. Chocolate Hazelnut Tarts

Indulge in the delightful world of Chocolate Hazelnut Tarts! These mini tarts are a sweet treat that looks impressive but is a breeze to whip up using Pillsbury pie crust. Perfect for parties or a cozy night in, they’ll have your friends and family raving about your baking skills.
Imagine buttery crusts filled with a rich, creamy chocolate hazelnut filling. With just a few ingredients, you can create these bite-sized wonders in no time. They’re not only delicious but also versatile. Pair them with fresh berries or a dusting of powdered sugar for that extra flair!
Recipe Overview
– Servings: 12 tarts
– Prep Time: 15 minutes
– Cook Time: 20 minutes
– Total Time: 35 minutes
– Calories: 180 per tart
Nutrition Information
– Total Fat: 11g
– Saturated Fat: 6g
– Carbohydrates: 18g
– Protein: 3g
Ingredients
– 1 Pillsbury pie crust
– 1 cup chocolate hazelnut spread
– 2 eggs
– ½ cup heavy cream
– ¼ cup sugar
Instructions
1. Preheat your oven to 350°F (175°C).
2. Roll out the dough and cut circles to fit mini muffin tins.
3. Press the dough into the tins and bake for 10 minutes until golden brown.
4. In a mixing bowl, combine the hazelnut spread, eggs, cream, and sugar. Mix until smooth.
5. Pour the filling into the baked pastry shells and bake for another 10 minutes.
Tips for Perfection
– Use any nut butter instead of hazelnut spread if you prefer.
– Store leftovers in an airtight container in the fridge for up to a week.
These Chocolate Hazelnut Tarts are the perfect way to treat yourself or impress at your next gathering. Enjoy every bite of this easy, delicious dessert!
Chocolate Hazelnut Tarts
Editor’s Choice
Pillsbury Premade Refrigerated Pie Crust, Two Pie Crusts, 14.1 oz

Nocciolata Organic Classic Hazelnut Spread, 8.82 Ounce

Nonstick 24 Cups Mini Muffin Pan with Extended Handles for Easy Grip, Ca…
12. Cinnamon Roll Pastry Puffs

Imagine turning your favorite breakfast treat into a delightful dessert. That’s exactly what you’ll get with these Cinnamon Roll Pastry Puffs! With the help of Pillsbury pie crust, you can whip up these sweet bites in no time. They make for a perfect brunch dish or a tempting snack any time of day.
Let’s dive into the details of this simple yet satisfying recipe.
Recipe Overview
– Servings: 12 puffs
– Prep Time: 15 minutes
– Cook Time: 20 minutes
– Total Time: 35 minutes
– Calories: 150 per puff
Nutrition Information
– Total Fat: 8g
– Saturated Fat: 4g
– Carbohydrates: 18g
– Protein: 2g
Ingredients
– 1 Pillsbury pie crust
– ½ cup sugar
– 2 tablespoons cinnamon
– 1 egg (for egg wash)
– ½ cup icing (for drizzling)
Instructions
1. Preheat your oven to 375°F (190°C).
2. Roll out the pie crust on a clean surface and cut it into squares.
3. In a small bowl, mix together the sugar and cinnamon. Generously sprinkle this mixture over each square.
4. Fold the corners of the squares together, pinching them to form puffs. Brush the tops with beaten egg for a golden finish.
5. Place the puffs on a baking sheet and bake for about 20 minutes, or until they are golden brown and puffed up.
6. Drizzle with icing just before serving for that extra sweetness.
These cinnamon roll pastry puffs are sure to impress. They pair wonderfully with coffee or tea, making your snack time feel special. For a delightful twist, sprinkle some nuts on top for added crunch.
Frequently Asked Questions
– Can I use store-bought icing?
Yes, both store-bought and homemade icing work beautifully.
– How do I store leftovers?
Keep them in a cool place for up to two days for the best taste.
With this recipe, you can enjoy the flavors of a cinnamon roll in a new and exciting way. Happy baking!
Did you know you can turn recipes using pillsbury pie crust into cinnamon roll pastry puffs in about 15 minutes? These quick, crowd-pleasing bites prove that recipes using pillsbury pie crust can transform breakfast into dessert in a snap.
Cinnamon Roll Pastry Puffs
Editor’s Choice
Adjustable Silicone Pie Crust Shields – Baking Protectors Cover Pie Edge…

13. Strawberry Rhubarb Pie Delight

Are you ready to whip up a dessert that perfectly balances sweet and tart? Look no further than this delightful Strawberry Rhubarb Pie. It’s a classic treat that never fails to impress. Using a Pillsbury pie crust makes it not only simple to prepare but also guarantees a flaky, buttery base that complements the vibrant filling. Picture a golden crust cradling a bubbling mix of juicy strawberries and tangy rhubarb—an absolute crowd-pleaser!
This pie is perfect for any occasion, whether it’s a summer picnic or a cozy family dinner. Serve it warm with a scoop of vanilla ice cream or a dollop of whipped cream for an extra special touch. Let’s dive into how you can make this delicious dessert.
Recipe Overview
– Servings: 8
– Prep Time: 15 minutes
– Cook Time: 45 minutes
– Total Time: 1 hour
– Calories: 300 per slice
Nutrition Information
– Total Fat: 14g
– Saturated Fat: 6g
– Carbohydrates: 39g
– Protein: 2g
Ingredients
– 1 Pillsbury pie crust
– 2 cups strawberries, sliced
– 2 cups rhubarb, sliced
– ¾ cup sugar
– 2 tablespoons cornstarch
– 1 tablespoon lemon juice
Instructions
1. Preheat your oven to 375°F (190°C).
2. In a large bowl, mix together the strawberries, rhubarb, sugar, cornstarch, and lemon juice until well combined.
3. Roll out the Pillsbury pie crust and place it into a pie pan. Pour the fruit mixture into the crust, spreading it evenly.
4. Bake in the preheated oven for 45 minutes. You’ll know it’s done when the filling bubbles and the crust turns a beautiful golden brown.
This pie is not just easy to make—it’s bursting with flavor! It’s a great way to enjoy seasonal fruits.
Frequently Asked Questions
– Can I use frozen fruit?
Yes, just make sure to thaw and drain the fruit before using it in the recipe.
– What’s the best way to store leftovers?
Keep leftover pie in the fridge for up to a week in an airtight container.
Now, grab those fresh strawberries and rhubarb, and get baking! This pie will surely become a favorite in your dessert rotation.
Strawberry Rhubarb Pie Delight
Editor’s Choice
Adjustable Silicone Pie Crust Shields – Baking Protectors Cover Pie Edge…

Mora Ceramic Deep Fluted Pie Dish for Baking – 9 inch Porcelain Pie Plat…
14. Key Lime Pie with a Twist

Whip up a delightful Key Lime Pie with a twist that’s as simple as it is delicious! Using a Pillsbury pie crust saves you time, allowing you to focus on the zesty flavors that make this dessert a hit. By adding a hint of vanilla, you elevate this classic treat, creating a rich and refreshing taste that dances on your palate. Perfect for summer gatherings or when you crave something sweet and tangy!
Here’s how you can make this scrumptious Key Lime Pie from start to finish:
Recipe Overview
– Servings: 8
– Prep Time: 15 minutes
– Cook Time: 30 minutes
– Total Time: 45 minutes
– Calories: 280 per slice
Nutrition Information
– Total Fat: 14g
– Saturated Fat: 8g
– Carbohydrates: 36g
– Protein: 3g
Ingredients
– 1 Pillsbury pie crust
– 4 egg yolks
– 1 can (14 oz) sweetened condensed milk
– ½ cup key lime juice
– 1 tsp vanilla extract
– Whipped cream (for topping)
Instructions
1. Preheat your oven to 350°F (175°C).
2. Bake the pie crust for about 10 minutes until it’s lightly golden.
3. In a mixing bowl, whisk together the egg yolks, sweetened condensed milk, key lime juice, and vanilla until smooth.
4. Pour this creamy mixture into the baked crust.
5. Bake for 30 minutes, or until the filling is set. Let it chill in the fridge before serving.
6. Top each slice with a dollop of whipped cream for that perfect finish.
This Key Lime Pie is perfect for warm days, providing a zesty kick that refreshes. For an extra burst of flavor, serve it with fresh lime slices or a sprinkle of lime zest.
Frequently Asked Questions
– Can I skip the vanilla? Absolutely! The pie is still tasty without it.
– How should I store leftovers? Keep it in the fridge for up to three days for the best taste.
Enjoy this easy-to-make dessert that impresses without the fuss. It’s a wonderful way to enjoy a classic treat with a modern twist!
Key Lime Pie with a Twist
Editor’s Choice

EurKitchen Professional Aluminum Whipped Cream Dispenser – Leak-Free Whi…

Deiss PRO Citrus Lemon Zester & Cheese Grater — Parmesan Cheese, Lemon, …
15. Raspberry Almond Tart

Create a delightful Raspberry Almond Tart that impresses with its stunning looks and delicious flavor. This dessert beautifully blends the nutty taste of almond with the sweet burst of fresh raspberries. Using Pillsbury pie crust, you can whip up this treat in no time, making it perfect for any gathering or a cozy night in.
Let’s dive into the details. This tart serves eight, has a prep time of just 15 minutes, and bakes in 30 minutes. Each slice contains around 300 calories, making it a satisfying yet indulgent dessert.
Recipe Overview
– Servings: 8
– Prep Time: 15 minutes
– Cook Time: 30 minutes
– Total Time: 45 minutes
– Calories: 300 per slice
Nutrition Information
– Total Fat: 15g
– Saturated Fat: 5g
– Carbohydrates: 38g
– Protein: 5g
Ingredients
– 1 Pillsbury pie crust
– 1 cup almond flour
– 1/2 cup sugar
– 2 eggs
– 1 tsp almond extract
– 1 cup raspberries (fresh or frozen)
Instructions
1. Preheat your oven to 350°F (175°C).
2. Roll out the Pillsbury pie crust and fit it into a tart pan.
3. In a mixing bowl, combine almond flour, sugar, eggs, and almond extract until smooth.
4. Pour this filling into the crust, then artfully arrange the raspberries on top.
5. Bake for 30 minutes, or until the tart is set and lightly golden.
This tart not only tastes amazing but also looks like a work of art, making it a perfect centerpiece for your dessert table. You can elevate its presentation with a sprinkle of powdered sugar or some toasted almonds on top.
Frequently Asked Questions
– Can I use different fruits?
Absolutely! Feel free to swap in other berries for a unique twist.
– How should I store leftovers?
Keep it covered in the fridge for up to three days to maintain freshness.
Now you have a delicious dessert that’s easy to make and sure to impress. Enjoy your baking adventure!
Raspberry Almond Tart
Editor’s Choice
Pie Crust Mix, Makes Two 9-inch Crusts, 11 oz. (Pack of 12)

Blue Diamond Almonds Almond Flour, Gluten Free, Blanched, Finely Sifted,…

Tart Pan, 9 Inch Tart Pans, Non-Stick Removable Loose Bottom Carbon Stee…
16. Sweet Potato Pie with Marshmallow Topping

Sweet potato pie is a delicious alternative to the classic pumpkin pie. This version, topped with fluffy marshmallows, is a crowd-pleaser for any holiday gathering or special occasion. Thanks to Pillsbury pie crust, you can whip it up with ease and enjoy a slice of warmth and sweetness.
Recipe Overview
– Servings: 8
– Prep Time: 15 minutes
– Cook Time: 45 minutes
– Total Time: 1 hour
– Calories: 320 per slice
Nutrition Information
– Total Fat: 13g
– Saturated Fat: 4g
– Carbohydrates: 45g
– Protein: 4g
Ingredients
– 1 Pillsbury pie crust
– 2 cups sweet potato puree
– ¾ cup sugar
– ½ cup milk
– 2 eggs
– 1 tsp vanilla extract
– 1 cup mini marshmallows (for topping)
Instructions
1. Preheat your oven to 350°F (175°C).
2. Bake the pie crust for 10 minutes until it’s lightly golden.
3. In a mixing bowl, whisk together the sweet potato puree, sugar, milk, eggs, and vanilla until smooth.
4. Pour this delicious mixture into the baked crust and bake for 30 minutes.
5. Remove the pie from the oven, add the marshmallows on top, and bake for another 5-10 minutes until they are golden brown.
This pie delivers a delightful combination of flavors. The creamy sweet potato filling pairs perfectly with the gooey marshmallow topping. It’s sure to be a hit at your table, creating warm memories with every bite.
Frequently Asked Questions
– Can I use canned sweet potatoes?
Yes! Just make sure they’re pureed smoothly.
– How do I store leftovers?
Cover the pie and refrigerate it for up to 3 days.
Enjoy this sweet potato pie as a new holiday tradition. It’s simple, tasty, and a sure way to impress your guests. Happy baking!
Sweet Potato Pie with Marshmallow Topping
Editor’s Choice
Premade Refrigerated Pie Crust, Two Pie Crusts, 14.1 oz

Jet-Puffed Vanilla Marshmallow Bits (3 oz Marshmallows Shaker)

Gerber 2nd Food Baby Food Butternut Squash Puree and Sweet Potato Puree,…
17. Chocolate Peanut Butter Pie

Indulge in the perfect combination of chocolate and peanut butter with this delightful Chocolate Peanut Butter Pie! If you’re looking for an easy, no-bake dessert that will impress your friends and family, you’ve found it. Thanks to Pillsbury pie crust, creating this rich and creamy treat is simple and quick. Whether it’s a birthday celebration or a casual gathering, this pie will steal the spotlight.
Here’s what you need to know:
– Servings: 8
– Prep Time: 15 minutes
– Total Time: 15 minutes
– Calories: 400 per slice
Nutrition Information:
– Total Fat: 28g
– Saturated Fat: 15g
– Carbohydrates: 35g
– Protein: 7g
Ingredients:
– 1 Pillsbury pie crust
– 1 cup creamy peanut butter
– 1 cup heavy cream
– ¾ cup powdered sugar
– ½ cup chocolate ganache (optional)
Instructions:
1. Start by whipping the heavy cream in a large bowl until stiff peaks form. This will give your pie a light and airy texture.
2. In another bowl, combine the creamy peanut butter and powdered sugar. Mix until smooth.
3. Gently fold the whipped cream into the peanut butter mixture. Be careful not to deflate the cream; you want it fluffy!
4. Pour this creamy filling into the prepared pie crust, spreading it evenly.
5. Chill the pie in the refrigerator for at least 2 hours. This allows the flavors to meld beautifully.
6. For an extra touch, drizzle chocolate ganache over the top just before serving. It adds a nice shine and a boost of chocolate flavor.
This pie is not just delicious; it’s a showstopper! For a fun twist, sprinkle some crushed peanuts on top for added crunch. Everyone will be asking for seconds!
Frequently Asked Questions:
– Can I use natural peanut butter?
Yes, but keep in mind that it may not be as creamy.
– How long can I keep it in the fridge?
This pie stays fresh for up to 4 days in the refrigerator. Enjoy it while it lasts!
With its rich flavors and easy preparation, this Chocolate Peanut Butter Pie is sure to become a favorite in your dessert rotation. Get ready to treat yourself and your loved ones!
Chocolate Peanut Butter Pie
Editor’s Choice
Pie Crust Mix, Makes Two 9-inch Crusts, 11 oz. (Pack of 12)

Amazon Grocery, Heavy Whipping Cream, Ultra-Pasteurized, 16 Fl Oz (Previ…

Cornaby’s Ready to Use Chocolate Ganache (2 pack) | Rich & Creamy Chocol…
18. Peanut Butter and Jelly Pie

Imagine biting into a slice of peanut butter and jelly pie—sweet, creamy, and oh-so nostalgic. This dessert puts a delightful twist on the classic sandwich we all loved as kids. With a simple Pillsbury pie crust, you can whip up this crowd-pleaser in no time, making it perfect for family gatherings or a fun dessert night.
Recipe Overview
– Servings: 8
– Prep Time: 10 minutes
– Cook Time: 30 minutes
– Total Time: 40 minutes
– Calories: 350 per slice
Nutrition Information
– Total Fat: 18g
– Saturated Fat: 8g
– Carbohydrates: 41g
– Protein: 6g
Ingredients
– 1 Pillsbury pie crust
– 1 cup creamy peanut butter
– ½ cup jelly (your favorite flavor)
– 1 cup powdered sugar
– 2 large eggs
Instructions
1. Preheat your oven to 350°F (175°C).
2. Place the pie crust in a pie pan and bake for 10 minutes until it turns golden brown.
3. In a mixing bowl, combine the peanut butter, powdered sugar, and eggs. Mix until smooth and creamy.
4. Spread the jelly evenly over the baked crust.
5. Pour the peanut butter mixture on top of the jelly, spreading it evenly.
6. Bake for an additional 30 minutes until the filling is set and lightly browned.
This pie is not just a treat; it’s a slice of childhood memories! Kids and adults alike will enjoy this fun dessert. Plus, it’s an easy recipe to follow, making it a hit for your next gathering. Just remember, the hardest part is waiting for it to cool!
Frequently Asked Questions
– Can I use crunchy peanut butter?
Yes! Crunchy peanut butter adds a fun texture to the pie.
– How do I store leftovers?
Keep any leftovers covered in the fridge for up to 3 days for the best taste.
Peanut Butter and Jelly Pie
Editor’s Choice
Adjustable Silicone Pie Crust Shields – Baking Protectors Cover Pie Edge…
26×16 Inch Extra Thick Silicone Baking Mat with Measurements, Non-slip a…
19. Funfetti Pie

Celebrate with a colorful funfetti pie that will brighten up any gathering! This delightful dessert brings joy and sweetness to your table, making it perfect for birthdays, holidays, or just a fun family dinner. With its vibrant sprinkles and creamy filling, this pie is not just tasty; it’s a feast for the eyes too!
Here’s how to whip up this funfetti pie in no time. You’ll use a Pillsbury pie crust, which saves you precious minutes. This recipe is simple, so even novice bakers will have success. Plus, it’s a crowd-pleaser that everyone will love!
Recipe Overview
– Servings: 8
– Prep Time: 15 minutes
– Cook Time: 30 minutes
– Total Time: 45 minutes
– Calories: 320 per slice
Nutrition Information
– Total Fat: 15g
– Saturated Fat: 8g
– Carbohydrates: 40g
– Protein: 3g
Ingredients
– 1 Pillsbury pie crust
– 1 cup vanilla frosting
– ½ cup funfetti cake mix
– 2 eggs
– Sprinkles (for topping)
Instructions
1. Preheat your oven to 350°F (175°C).
2. Fit the pie crust into a pie pan and bake for 10 minutes until it’s lightly golden.
3. In a mixing bowl, combine the vanilla frosting, funfetti cake mix, and eggs. Mix until smooth and creamy.
4. Pour the filling into the baked crust and return it to the oven. Bake for an additional 30 minutes or until set.
5. Once it cools, top with a generous sprinkle of colorful sprinkles for that festive touch!
This pie is not only easy to make but also brings a sense of celebration to your dessert table. Feel free to add a dollop of whipped cream or fresh fruit on top for extra flair!
Frequently Asked Questions
– Can I use any flavor of frosting? Yes! Vanilla works best, but feel free to experiment with chocolate or any other favorite flavors.
– How do I store leftovers? Simply cover the pie and keep it in the fridge for up to 3 days. Enjoy your sweet creation later!
Funfetti Pie
Editor’s Choice
Adjustable Silicone Pie Crust Shields – Baking Protectors Cover Pie Edge…

Duncan Hines Creamy Vanilla Flavored Frosting, Halloween Cookie Decorati…

20. Chocolate Chip Cookie Pie

Chocolate chip cookies are a beloved treat, and turning them into a pie is a dream come true! Imagine a warm, gooey filling made of chocolate chip cookie dough, all nestled in a flaky Pillsbury pie crust. This dessert is not just easy to make; it’s also a showstopper at any gathering. Plus, it pairs beautifully with a scoop of vanilla ice cream. Let’s dive into how you can whip up this delicious Chocolate Chip Cookie Pie in no time!
Recipe Overview
– Servings: 8
– Prep Time: 15 minutes
– Cook Time: 35 minutes
– Total Time: 50 minutes
– Calories: 400 per slice
Nutrition Information
– Total Fat: 22g
– Saturated Fat: 10g
– Carbohydrates: 45g
– Protein: 5g
Ingredients
– 1 Pillsbury pie crust
– 1 cup chocolate chip cookie dough (prepared)
– 1/2 cup sugar
– 2 eggs
– 1/2 cup butter (melted)
Instructions
1. Preheat your oven to 350°F (175°C).
2. Roll out the Pillsbury pie crust and place it into a pie dish.
3. In a mixing bowl, blend the cookie dough, sugar, eggs, and melted butter until smooth and creamy.
4. Pour this delicious mixture into the prepared pie crust.
5. Bake for 35 minutes or until the top turns golden brown and the filling is set.
This Chocolate Chip Cookie Pie is perfect for family gatherings, birthday parties, or just a cozy night in. Serve it warm with ice cream for an extra indulgent treat!
Frequently Asked Questions
– Can I use store-bought cookie dough?
Absolutely! Store-bought dough works perfectly and saves time.
– How do I store leftovers?
Keep it covered in the fridge for up to three days, if it lasts that long!
This recipe is a simple way to enjoy a classic favorite in a new form. It’s quick, delicious, and sure to impress everyone at your table. Happy baking!
Chocolate Chip Cookie Pie
Editor’s Choice

Traditional Light & Flaky Pie Crust Mix, 20 Ounce (Pack of 3)

Chobani® Flip® Low-Fat Greek Yogurt Chocolate Chip Cookie Dough 4.5oz

Alden’s, Organic Vanilla Bean Ice Cream, 48 oz (Frozen)
21. Berry Tart with Cream

A berry tart is not just a dessert; it’s a celebration of fresh, vibrant flavors. With the help of a Pillsbury pie crust, this delightful treat becomes a breeze to make. Picture a golden crust cradling a luscious layer of whipped cream and a colorful array of berries. Whether you’re hosting friends or enjoying a family dinner, this tart is sure to impress!
Let’s dive into how to prepare this stunning dessert. You’ll need just a few simple ingredients, making this recipe accessible for any home baker. The beauty of this tart is that you can play with different berries based on what’s in season or what you love most.
Recipe Overview
– Servings: 8
– Prep Time: 15 minutes
– Cook Time: 30 minutes
– Total Time: 45 minutes
– Calories: 280 per slice
Nutrition Information
– Total Fat: 12g
– Saturated Fat: 6g
– Carbohydrates: 36g
– Protein: 3g
Ingredients
– 1 Pillsbury pie crust
– 1 cup heavy cream
– ½ cup sugar
– 1 cup mixed berries (blueberries, strawberries, raspberries)
Instructions
1. Preheat your oven to 375°F (190°C).
2. Roll out the Pillsbury pie crust and place it in a pie dish. Bake for about 30 minutes, until it’s lightly golden.
3. While the crust cools, whip the heavy cream and sugar together until soft peaks form.
4. Spread the whipped cream generously over the cooled crust.
5. Top with your mixed berries, arranging them beautifully.
This tart is not only easy to make, but it also looks stunning on any table. Feel free to mix and match your berries for a unique flavor combination. Seasonal berries can add a fresh twist that makes each tart special!
Frequently Asked Questions
– Can I use frozen berries?
Yes, just ensure they are thawed and drained before use.
– How should I store leftovers?
Keep any extras covered in the fridge for up to 2 days.
This berry tart is perfect for any occasion, from family gatherings to summer BBQs. Enjoy creating this delicious masterpiece that’s as pleasing to the eyes as it is to the taste buds!
Berry Tart with Cream
Editor’s Choice
Organic Valley, Cream Heavy Whipping Ultra-Pasturized Organic, 16 Fl Oz

Umite Chef Mixing Bowls with Airtight Lids Set, 8PCS Stainless Steel Kha…
22. Almond Joy Pie

Indulge in the sweet, nostalgic flavors of your favorite candy bar with this delightful Almond Joy Pie. If you adore chocolate and coconut, this simple recipe is just for you! Using a Pillsbury pie crust, you can create a dessert that not only satisfies your cravings but also impresses your friends and family. Imagine a creamy, chocolatey filling topped with crunchy almonds and fluffy whipped cream—absolutely irresistible!
Recipe Overview
– Servings: 8
– Prep Time: 15 minutes
– Cook Time: 30 minutes
– Total Time: 45 minutes
– Calories: 350 per slice
Nutrition Information
– Total Fat: 22g
– Saturated Fat: 14g
– Carbohydrates: 36g
– Protein: 5g
Ingredients
– 1 Pillsbury pie crust
– 1 cup chocolate syrup
– 1 cup coconut flakes
– 1/2 cup chopped almonds
– 1 cup whipped cream
Instructions
1. Preheat your oven to 350°F (175°C).
2. Place the Pillsbury pie crust in a pie dish and bake for 15 minutes until it’s golden brown.
3. Once the crust is baked, pour the chocolate syrup evenly over it.
4. In a mixing bowl, combine the coconut flakes and chopped almonds. Spread this mixture over the chocolate layer.
5. Finally, top your pie with a generous amount of whipped cream. Serve and enjoy!
This Almond Joy Pie is not just a treat; it’s a showstopper that will have everyone coming back for seconds. Plus, it’s quick to prepare, making it a perfect dessert for any gathering or a cozy night in. If you’re wondering about storage, just cover any leftovers and pop them in the fridge for up to three days—if they last that long!
Frequently Asked Questions
– Can I use milk chocolate instead of chocolate syrup?
Yes, melted chocolate can be a delicious alternative!
– How do I store leftovers?
Keep your pie covered in the fridge for up to three days.
Dive into this easy Almond Joy Pie recipe today, and let your taste buds celebrate!
Almond Joy Pie
Editor’s Choice
Adjustable Silicone Pie Crust Shields – Baking Protectors Cover Pie Edge…


Anthony’s Organic Shredded Coconut, 2 lb, Unsweetened, Gluten Free, Non …
23. Caramel Apple Pie

Elevate your dessert game with a scrumptious caramel apple pie. This delightful twist on the classic apple pie combines tender apples with a sweet caramel drizzle. When you use a Pillsbury pie crust, you simplify the process, making it an ideal choice for gatherings or family dinners. The best part? This pie is a hit with everyone, ensuring it vanishes quickly from the dessert table!
Let’s break down this easy recipe so you can whip it up in no time. You’ll need about 20 minutes to prepare and 45 minutes to bake, giving you a total of just over an hour to serve up this crowd-pleaser. The result? A warm, gooey pie that pairs perfectly with a scoop of vanilla ice cream.
Recipe Overview
– Servings: 8
– Prep Time: 20 minutes
– Cook Time: 45 minutes
– Total Time: 1 hour 5 minutes
– Calories: 310 per slice
Nutrition Information
– Total Fat: 15g
– Saturated Fat: 7g
– Carbohydrates: 40g
– Protein: 3g
Ingredients
– 1 Pillsbury pie crust
– 6 cups sliced apples (choose a mix for flavor)
– ¾ cup sugar
– 1 tsp cinnamon
– ¼ cup caramel sauce (store-bought works great)
– 1 tbsp lemon juice
Instructions
1. Preheat your oven to 425°F (220°C).
2. In a large mixing bowl, combine the sliced apples with sugar, cinnamon, and lemon juice. Toss everything together to coat the apples evenly.
3. Roll out your Pillsbury pie crust and fit it into a 9-inch pie pan.
4. Pour the apple mixture into the crust, making sure to spread it evenly. Drizzle the caramel sauce over the apples.
5. Roll out a second pie crust for the top. Place it over the filling and seal the edges well.
6. Bake in the preheated oven for about 45 minutes or until the apples are tender and the crust is a golden brown.
Now, if you have any leftovers (which is rare!), store them in the fridge for up to three days. You can heat slices in the microwave for a warm treat later. This pie not only satisfies your sweet tooth but also brings a cozy, homemade vibe to your kitchen.
Frequently Asked Questions
– Can I use store-bought caramel sauce?
Absolutely! It saves time and adds delicious flavor.
– How should I store leftovers?
Keep them in the fridge, covered, for up to three days.
Ready to impress your family and friends? This caramel apple pie brings warmth and sweetness to any gathering. Enjoy every slice!
Fun fact: 25% of quick desserts start with recipes using Pillsbury pie crust, and this Caramel Apple Pie proves it. Prep takes about 20 minutes, then the pie bakes into a crowd-pleaser that vanishes fast—perfect for gatherings.
Caramel Apple Pie
Editor’s Choice
Adjustable Silicone Pie Crust Shields – Baking Protectors Cover Pie Edge…

Ghirardelli Caramel Sauce Squeeze Bottle, 16 oz (Pack of 1)
GoodCook Everyday Nonstick Steel Pie Pan , 9″, Gray
24. Vanilla Custard Tart

Indulge in the creamy delight of a Vanilla Custard Tart that’s both luxurious and simple. This dessert is perfect for any gathering or celebration. With the help of a Pillsbury pie crust, you can whip up a velvety custard filling without the fuss. Imagine serving a slice of this tart, topped with fresh berries, to your family and friends. They’ll love the smooth texture and rich flavor!
Let’s break down how to make this fantastic tart. The process is straightforward and takes about 50 minutes from start to finish. You’ll enjoy every bite of this 320-calorie dessert, and the best part is how easy it is to make!
Recipe Overview
– Servings: 8
– Prep Time: 15 minutes
– Cook Time: 35 minutes
– Total Time: 50 minutes
– Calories: 320 per slice
Nutrition Information
– Total Fat: 16g
– Saturated Fat: 8g
– Carbohydrates: 38g
– Protein: 5g
Ingredients
– 1 Pillsbury pie crust
– 2 cups milk
– 3 large eggs
– ½ cup sugar
– 1 tbsp vanilla extract
– Pinch of salt
Instructions
1. Preheat your oven to 350°F (175°C).
2. Place the pie crust in a pie dish and bake for 10 minutes or until golden brown.
3. In a saucepan, gently heat the milk until warm, but not boiling.
4. In a mixing bowl, whisk together the eggs, sugar, vanilla, and salt until smooth.
5. Gradually pour the warm milk into the egg mixture, stirring constantly to combine.
6. Pour the custard mixture into the pre-baked pie crust.
7. Bake for 35 minutes or until the custard is just set and slightly wobbly in the center.
Top your Vanilla Custard Tart with fresh fruit for a pop of color and a burst of flavor. This dessert is not just a treat; it’s a sweet centerpiece for any table!
Frequently Asked Questions
– Can I make it ahead of time?
Yes, it keeps well in the fridge for up to 3 days.
– How do I store leftovers?
Cover the tart and store it in the fridge for up to a week.
Anyone can wow guests with a Vanilla Custard Tart—thanks to recipes using pillsbury pie crust. It’s creamy, simple, and totally doable in under an hour. Bake, slice, and savor with berries.
Vanilla Custard Tart
Editor’s Choice
Pie Crust Mix, Makes Two 9-inch Crusts, 11 oz. (Pack of 12)
Umite Chef Mixing Bowls with Airtight Lids Set, 8PCS Stainless Steel Kha…
26×16 Inch Extra Thick Silicone Baking Mat with Measurements, Non-slip a…
25. Tropical Fruit Pie

Indulge in a taste of the tropics with this delightful Tropical Fruit Pie. It’s a burst of sunshine on your plate, perfect for hot summer days. With vibrant colors and refreshing flavors, this pie is sure to impress your family and friends. Plus, using a Pillsbury pie crust makes it easy and quick to whip up!
Recipe Overview
– Servings: 8
– Prep Time: 15 minutes
– Cook Time: 30 minutes
– Total Time: 45 minutes
– Calories: 280 per slice
Nutrition Information
– Total Fat: 10g
– Saturated Fat: 5g
– Carbohydrates: 40g
– Protein: 2g
Ingredients
– 1 Pillsbury pie crust
– 2 cups mixed tropical fruits (think mango, pineapple, and kiwi)
– ½ cup sugar
– 1 tbsp cornstarch
– 1 tbsp lemon juice
– 1 tsp coconut extract
Instructions
1. Preheat your oven to 375°F (190°C).
2. Mix the fruits: In a large bowl, combine tropical fruits, sugar, cornstarch, lemon juice, and coconut extract. Toss gently to coat the fruits evenly.
3. Prepare the crust: Roll out the Pillsbury pie crust and fit it into a pie pan.
4. Fill with fruit: Pour the fruity mixture into the prepared crust, spreading it out evenly.
5. Bake: Place the pie in the oven and bake for about 30 minutes or until the crust is golden and the filling is bubbling.
This pie not only looks stunning but also tastes incredible. For an extra tropical twist, serve it with whipped cream or scoop of coconut ice cream on top!
Frequently Asked Questions
– Can I use frozen tropical fruits?
Yes, just make sure to thaw them completely before mixing.
– How should I store leftovers?
Keep the pie in the fridge. It will stay fresh for up to 3 days, though it’s best enjoyed right away!
Enjoy your tropical escape with every slice of this easy-to-make pie!
Tropical Fruit Pie
Editor’s Choice
Premade Refrigerated Pie Crust, Two Pie Crusts, 14.1 oz

McCormick Coconut Extract with Other Natural Flavors, 2 fl oz
EurKitchen Professional Aluminum Whipped Cream Dispenser – Leak-Free Whi…
26. Cherry Pie with a Crumble Topping

Indulge in the sweet and tangy flavors of a Cherry Pie with a delightful crumble topping! This recipe is a fun twist on the traditional cherry pie, and it’s simple to make using the trusty Pillsbury pie crust. Picture juicy cherries bursting with flavor, topped with a crunchy, buttery crumble. It’s a dessert that will impress everyone at the table!
Recipe Overview
– Servings: 8
– Prep Time: 20 minutes
– Cook Time: 45 minutes
– Total Time: 1 hour 5 minutes
– Calories: 310 per slice
Nutrition Information
– Total Fat: 15g
– Saturated Fat: 7g
– Carbohydrates: 40g
– Protein: 3g
Ingredients
– 1 Pillsbury pie crust
– 2 cups pitted cherries (fresh or frozen)
– ½ cup sugar
– 1 tbsp cornstarch
– ½ cup flour
– ¼ cup brown sugar
– ¼ cup butter (softened)
Instructions
1. Start by preheating your oven to 425°F (220°C).
2. In a mixing bowl, combine the cherries, sugar, and cornstarch. Toss them well until the cherries are coated.
3. Roll out the Pillsbury pie crust and fit it into a pie dish. Pour the cherry mixture into the crust.
4. In another bowl, mix the flour, brown sugar, and softened butter until it resembles coarse crumbs.
5. Sprinkle the crumble topping evenly over the cherries.
6. Bake your pie for 45 minutes, or until the topping is golden brown and the filling is bubbling.
Serve this warm, perhaps with a scoop of vanilla ice cream. The contrast of the warm pie and cold ice cream will make every bite heavenly!
Frequently Asked Questions
– Can I use canned cherries?
Yes! Just remember to reduce the sugar since they are usually sweetened.
– How do I store leftovers?
Keep your pie covered in the fridge, and it will stay fresh for up to 4 days.
This cherry pie is not just a dessert; it’s a crowd-pleaser perfect for family gatherings or a cozy night in. Enjoy every slice!
Cherry Pie with a Crumble Topping
Editor’s Choice
Pie Crust Mix, Makes Two 9-inch Crusts, 11 oz. (Pack of 12)

Umite Chef Mixing Bowls with Airtight Lids Set, 8PCS Stainless Steel Kha…
Conclusion

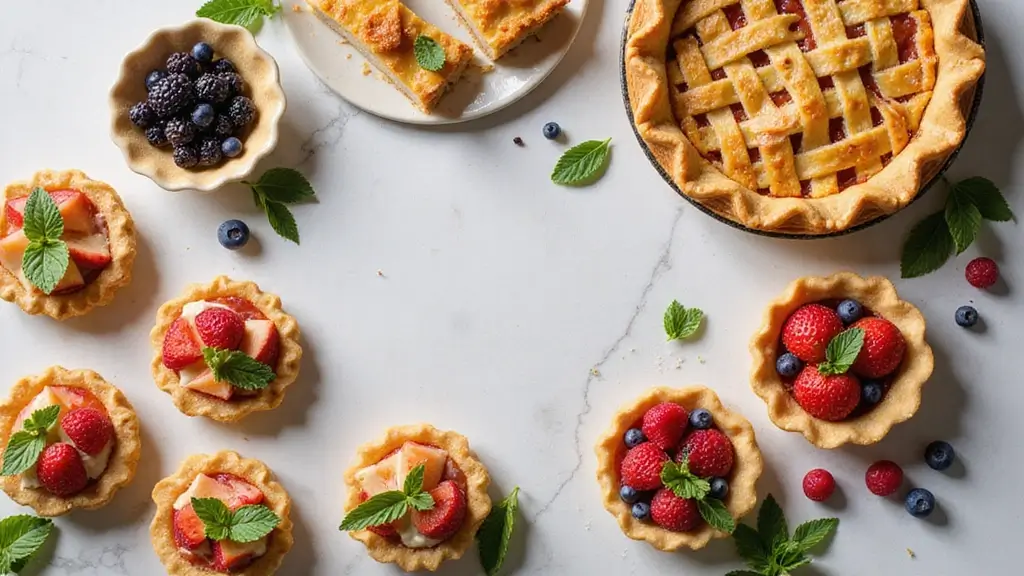
There you have it—26 drool-worthy recipes using Pillsbury pie crust that can transform your baking adventures into effortless masterpieces.
From sweet to savory, these recipes show just how versatile and fun baking can be with a little help from Pillsbury. So next time you’re in the mood to bake, grab that pie crust and let your creativity shine! Happy baking!
Note: We aim to provide accurate product links, but some may occasionally expire or become unavailable. If this happens, please search directly on Amazon for the product or a suitable alternative.
This post contains Amazon affiliate links, meaning I may earn a small commission if you purchase through my links, at no extra cost to you.
Frequently Asked Questions
What Are Some Easy Pie Crust Recipes Using Pillsbury Pie Crust?
Pillsbury pie crust is a fantastic time-saver for baking! You can whip up a variety of easy pie crust recipes, like a classic apple pie, a creamy chocolate cream pie, or even a savory quiche. The versatility of Pillsbury makes it perfect for both sweet and savory dishes, so let your creativity shine in the kitchen!
Check out our article for 26 delightful recipes that will inspire your next baking adventure.
How Can I Use Pillsbury Pie Crust for Quick Dessert Recipes?
Want to impress your guests with minimal effort? Pillsbury pie crust is your best friend! You can create quick dessert recipes like mini fruit tarts, cinnamon roll pie bites, or a delicious berry galette in no time. Just roll out the crust, fill it with your favorite fruits or fillings, bake, and enjoy!
These effortless baking ideas are perfect for last-minute gatherings or sweet cravings.
Are There Homemade Pie Crust Alternatives to Pillsbury Pie Crust?
Absolutely! If you’re looking for homemade pie crust alternatives, you can try using a mixture of flour, butter, and water for a classic flaky crust. Other options include almond flour or whole wheat crusts for a healthier twist.
However, if you want to save time, Pillsbury pie crust offers a convenient, tasty solution without sacrificing flavor. It’s all about finding what works best for your baking needs!
What Are Some Effortless Baking Tips When Using Pillsbury Pie Crust?
To make your baking experience even easier with Pillsbury pie crust, here are some tips: Always let the crust come to room temperature before unrolling it for better handling, and keep your fillings chilled to prevent sogginess.
Additionally, pre-bake the crust for pies with wet fillings, and brush the crust with an egg wash for a beautiful golden finish. These simple tricks will elevate your baking game!
Can I Freeze Pillsbury Pie Crust for Later Use?
Yes, you can freeze Pillsbury pie crust! Just make sure to wrap it tightly in plastic wrap or foil before placing it in the freezer. It can last for up to 2 months. When you’re ready to use it, simply thaw it in the refrigerator overnight.
This way, you’ll always have a convenient option on hand for those spontaneous baking moments!
Related Topics
easy desserts
Pillsbury pie crust
quick dessert recipes
homemade pie crust alternatives
effortless baking
30-minute recipes
family-friendly desserts
baking with kids
seasonal pies
simple baking tips
easy pie crust recipes
Pillsbury baking ideas