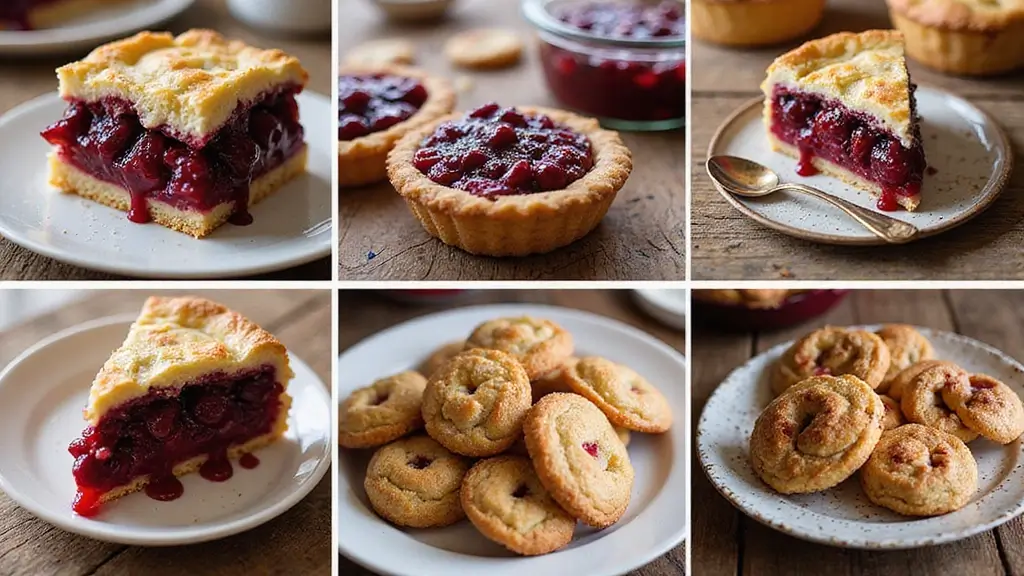
If you’ve ever opened a can of cherry pie filling, you know the sweet, tangy goodness that comes rushing out. This time of year has me craving those bright red cherries and all the delicious baking they inspire. If you love baking or simply enjoy desserts that look and taste like they came from a bakery, this post is for you.
I created this collection because cherry pie filling is one of the most versatile ingredients out there. You can use it in more than just traditional pies. Whether you’re a seasoned baker or a beginner looking to impress, I’ve pulled together 29 recipes that are not only delicious but also look bakery-perfect. These ideas will help you create stunning desserts that your friends and family will rave about.
In this post, you’ll find a variety of recipes that cater to every occasion, from easy weeknight treats to impressive desserts for special events. You’ll learn how to make cherry-filled cakes, pastries, and even breakfast items that incorporate that delightful cherry flavor. Each recipe offers step-by-step guidance, so you’ll feel confident trying something new in the kitchen.
Get ready to satisfy your sweet tooth and impress your loved ones. Dive into these cherry-filled creations and discover how simple it can be to bake something absolutely beautiful. With these 29 recipes, you’ll feel inspired to open that can of cherry pie filling and let your baking creativity flourish.
1. Cherry Cheesecake Bars
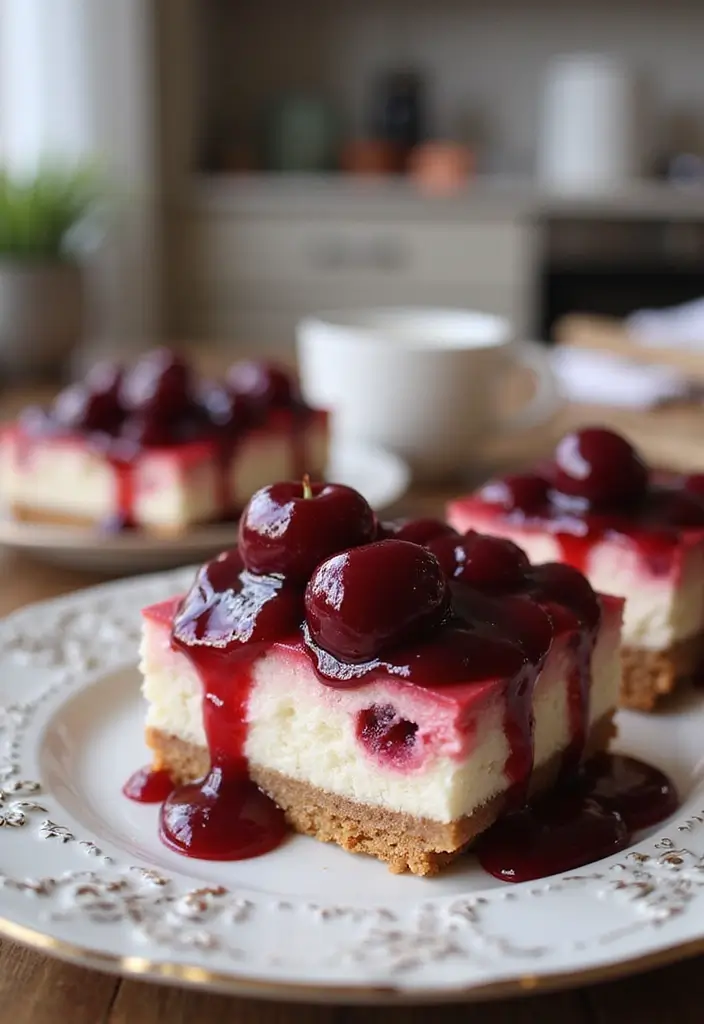
Imagine biting into a creamy cherry cheesecake bar that melts in your mouth. These delightful treats are the perfect way to start your cherry dessert adventure. The tangy cream cheese paired with sweet cherry pie filling strikes a perfect harmony of flavors. Plus, they’re easy to cut into squares, making them a hit for any gathering.
Here’s a quick look at what you’ll need to whip up these delicious bars:
Recipe Overview:
– Servings: 12 bars
– Prep Time: 20 minutes
– Cook Time: 30 minutes
– Total Time: 50 minutes
– Calories: 250 per bar
Nutritional Information:
– Total Fat: 15g
– Cholesterol: 60mg
– Sodium: 200mg
– Total Carbohydrates: 25g
– Sugars: 15g
Ingredients:
– 1 cup graham cracker crumbs
– 1/2 cup butter, melted
– 2 (8 oz) packages cream cheese, softened
– 3/4 cup sugar
– 2 large eggs
– 1 tsp vanilla extract
– 1 can cherry pie filling
Step-by-Step Instructions:
1. Preheat your oven to 325°F (163°C).
2. In a mixing bowl, combine graham cracker crumbs with melted butter. Press this mixture into the bottom of a greased 9×9-inch baking dish.
3. In another bowl, blend softened cream cheese and sugar until smooth and creamy.
4. Add eggs one at a time, mixing well after each addition. Stir in vanilla extract.
5. Pour the cheesecake mixture over the crust and smooth the top with a spatula.
6. Bake for about 30 minutes, or until the center is set and slightly firm.
7. Allow the bars to cool completely. Then, gently spread the cherry pie filling over the top.
8. Chill in the refrigerator for a minimum of 2 hours before cutting into bars.
Want a fun twist? You can mix a bit of the cherry filling into the cheesecake layer before baking for a beautiful swirl effect.
FAQs:
– Can I use different pie fillings? Absolutely! Feel free to try blueberry or peach fillings for a change.
These cherry cheesecake bars not only taste fantastic but also look stunning. They’re perfect for parties, potlucks, or just a sweet treat at home. Enjoy the deliciousness!
Cherry Cheesecake Bars
Editor’s Choice
DOWAN 8×8 Baking dish, Square Baking Pan, Ceramic Casserole Dishes for O…
 Amazon$24.99
Medley Hills Farm Graham cracker crumbs – in Resealable Bag – 1.5 lbs
 Amazon$13.99
Hamilton Beach 6-Speed Electric Hand Mixer with Whisk, Traditional Beate…
 AmazonGBP 20.97
2. Cherry Almond Danish
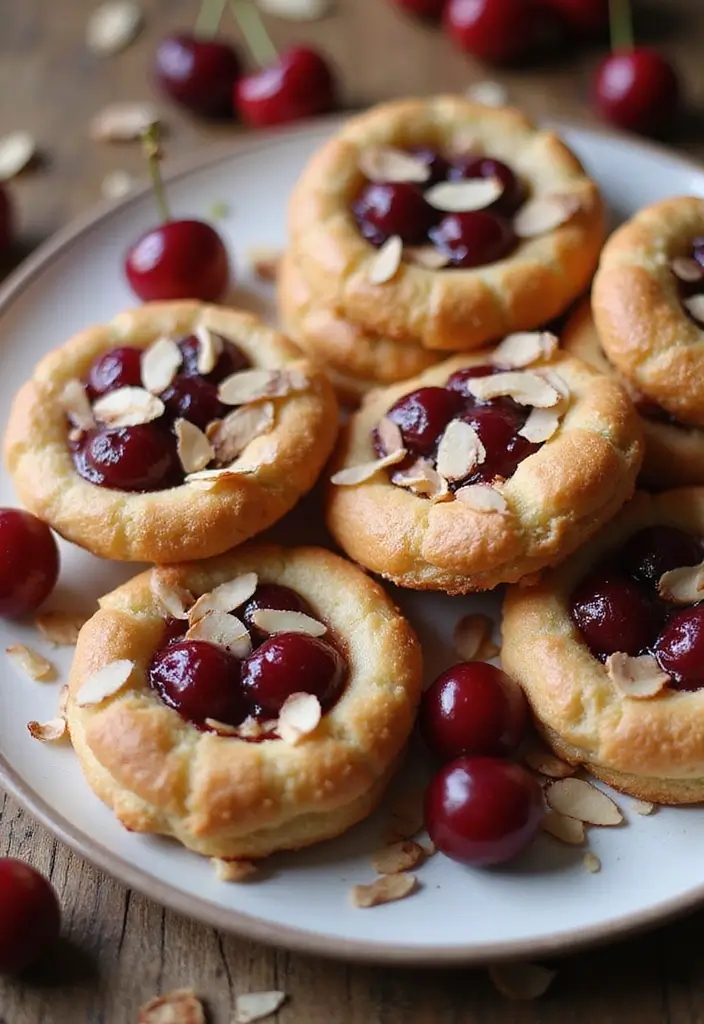
Step into your kitchen and let the sweet scent of cherries and almonds fill the air! This Cherry Almond Danish is not just a pastry; it’s a delightful experience. Picture flaky puff pastry, warm cherry pie filling, and a drizzle of nutty almond glaze. Whether you enjoy it for breakfast, dessert, or a cozy afternoon snack, this treat will impress everyone!
Recipe Overview:
– Servings: 8 pastries
– Prep Time: 15 minutes
– Cook Time: 20 minutes
– Total Time: 35 minutes
– Calories: 300 per pastry
Nutrition Information:
– Total Fat: 18g
– Cholesterol: 25mg
– Sodium: 180mg
– Total Carbohydrates: 30g
– Sugars: 10g
Ingredients:
– 1 sheet puff pastry, thawed
– 1 can cherry pie filling
– 1/4 cup almond slivers
– 1 egg, beaten (for egg wash)
– 1/2 cup powdered sugar
– 1-2 tbsp milk (for glaze)
Instructions:
1. Preheat your oven to 400°F (204°C) and line a baking sheet with parchment paper.
2. Roll out the thawed puff pastry on a floured surface. Cut it into squares.
3. Spoon cherry pie filling into the center of each square.
4. Fold the corners of the pastry over the filling and pinch them to seal.
5. Brush the tops with beaten egg, and sprinkle with almond slivers.
6. Bake for 20 minutes or until they turn golden brown.
7. For the glaze, mix powdered sugar with milk until smooth, and drizzle it over the warm pastries.
Tip: Keep your pastry cold for flakier results!
FAQs:
– Can I use fresh cherries? Yes! Just cook them with sugar to create your filling.
Now, gather your ingredients and treat yourself and your loved ones to these irresistible Cherry Almond Danishes. They are sure to become a favorite in your home!
Cherry Almond Danish
Editor’s Choice

Mariani Nut – Sliced Premium California Almonds – Gluten Free, Kosher Ce…
 AmazonKRW 21,400
200Pcs Parchment Paper,12×16 Inches Non-Stick Precut Parchment Paper She…
 Amazon$9.89
3. Cherry Pie Filling Stuffed Pancakes
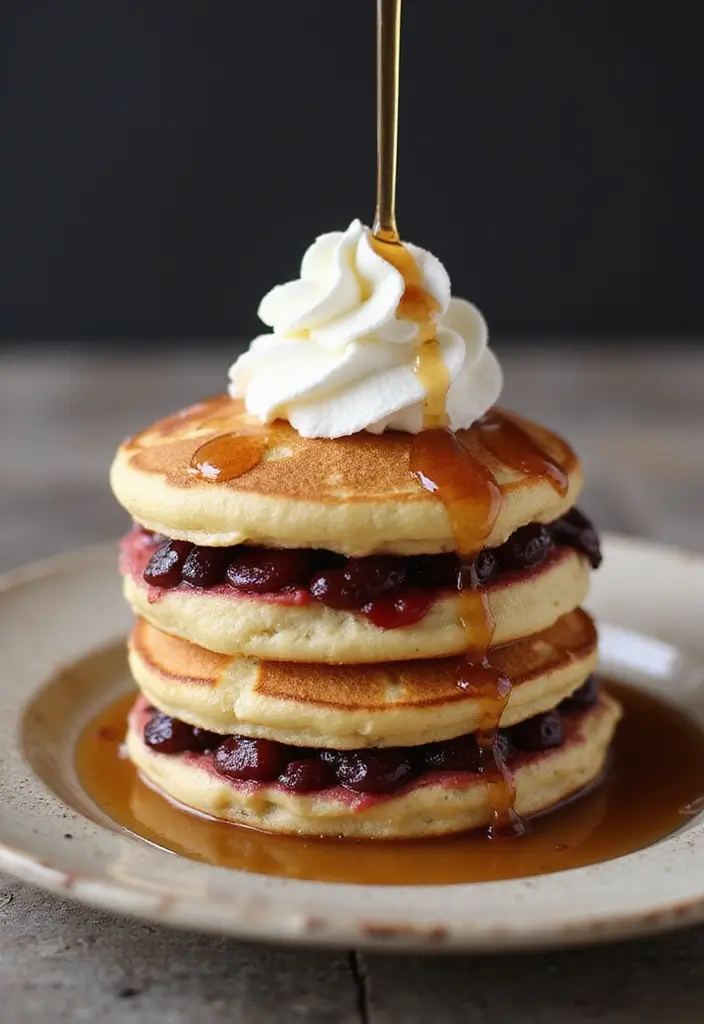
Wake up to a delightful breakfast with Cherry Pie Filling Stuffed Pancakes! These fluffy pancakes are a fun twist on your morning routine. Imagine sinking your fork into a warm pancake, only to discover a sweet cherry surprise inside. Top them off with a drizzle of maple syrup or a dollop of whipped cream, and you have a breakfast that feels like a treat from your favorite bakery.
Recipe Overview:
– Servings: 4 servings
– Prep Time: 15 minutes
– Cook Time: 10 minutes
– Total Time: 25 minutes
– Calories: 350 per serving
Nutrition Information:
– Total Fat: 15g
– Cholesterol: 65mg
– Sodium: 500mg
– Total Carbohydrates: 50g
– Sugars: 20g
Ingredients:
– 1 cup all-purpose flour
– 1 tbsp sugar
– 1 tsp baking powder
– 1/2 tsp baking soda
– 1/4 tsp salt
– 1 cup buttermilk
– 1 egg
– 1 can cherry pie filling
– Butter for cooking
Step-by-Step Instructions:
1. In a medium bowl, whisk together the flour, sugar, baking powder, baking soda, and salt.
2. In another bowl, combine the buttermilk and egg until well mixed.
3. Pour the wet ingredients into the dry ingredients and stir gently until just blended.
4. Heat a skillet over medium heat and melt a little butter.
5. Pour 1/4 cup of the batter into the skillet. Add a spoonful of cherry pie filling on top.
6. Cover the filling with more batter. Cook until bubbles appear on the surface, then flip and cook until golden brown.
7. Serve warm, topped with syrup or whipped cream.
Remember, don’t overmix the batter! This keeps your pancakes light and fluffy.
FAQs:
– Can I make these pancakes ahead of time? Yes! You can reheat them in a toaster or microwave for a quick breakfast.
This recipe not only satisfies your sweet tooth but also adds a fun twist to traditional pancakes. Enjoy every bite!
Cherry Pie Filling Stuffed Pancakes
Editor’s Choice

CAROTE Nonstick Frying Pan Skillet,Non Stick Granite Fry Pan Egg Pan Ome…
 Amazon$14.99
4. Cherry Pie Filling Muffins
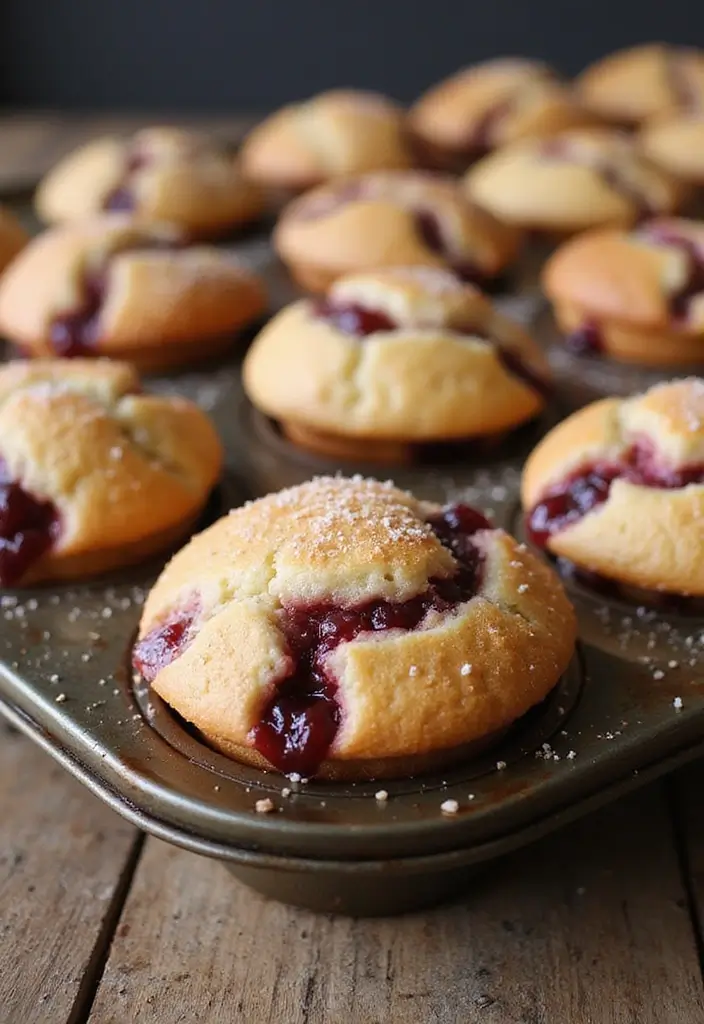
Start your day with a burst of sunshine! These Cherry Pie Filling Muffins are a delightful way to enjoy the sweet taste of summer in the morning. Imagine biting into a warm, fluffy muffin, where juicy cherries peek through the soft bread. Topped with a sprinkle of sugar, every bite offers a satisfying crunch. They make a perfect breakfast or a sweet snack when you’re on the go!
Here’s a quick look at the recipe:
– Servings: 12 muffins
– Prep Time: 10 minutes
– Cook Time: 20 minutes
– Total Time: 30 minutes
– Calories: 200 per muffin
Nutrition Facts:
– Total Fat: 8g
– Cholesterol: 30mg
– Sodium: 250mg
– Total Carbohydrates: 30g
– Sugars: 15g
Ingredients:
– 2 cups all-purpose flour
– 1/2 cup sugar
– 1 tbsp baking powder
– 1/2 tsp salt
– 1/2 cup milk
– 1/3 cup vegetable oil
– 1 egg
– 1 can cherry pie filling
– Extra sugar for topping
Instructions:
1. Preheat your oven to 350°F (175°C) and line a muffin tin with paper liners.
2. In a large bowl, mix the flour, sugar, baking powder, and salt until well combined.
3. In another bowl, whisk together the milk, vegetable oil, and egg until smooth.
4. Pour the wet ingredients into the dry mixture. Stir gently until just combined.
5. Fold in half of the cherry pie filling carefully.
6. Fill each muffin cup about two-thirds full with the batter.
7. Top each muffin with a spoonful of the remaining cherry filling.
8. Sprinkle a little sugar on top for that delightful crunch.
9. Bake for 20 minutes or until a toothpick comes out clean.
For a fun twist, add a splash of almond extract to the batter. It gives the muffins a lovely nutty flavor!
FAQs:
– Can you freeze these muffins? Yes! Store them in an airtight container for up to 3 months. Enjoy them whenever you crave a taste of summer!
Get ready to impress your family and friends with these easy and delicious Cherry Pie Filling Muffins. They’re sure to become a favorite!
Cherry Pie Filling Muffins
Editor’s Choice

Amazon Basics Nonstick Round Muffin Baking Pan, 12 Cups, Set of 2, Gray,…
 Amazon$14.97
24 Pack Silicone Baking Cups Reusable Muffin Liners Non-Stick Cup Cake M…
 Amazon$7.74
5. Cherry Pie Filling Cookies
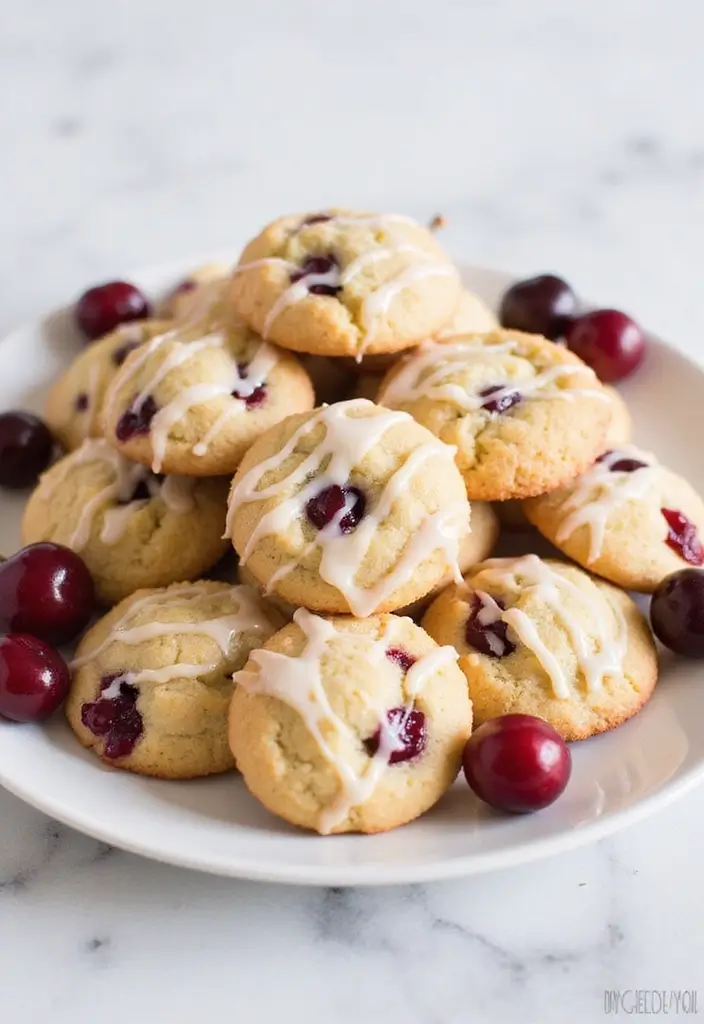
Get ready to indulge in the delightful world of Cherry Pie Filling Cookies! Imagine sinking your teeth into a soft, buttery cookie bursting with sweet cherry goodness. These cookies are not only a fun twist on the classic dessert but also a surefire hit at any gathering. With their chewy texture and fruity flair, they’re bound to disappear in no time!
Recipe Overview:
– Servings: 24 cookies
– Prep Time: 15 minutes
– Cook Time: 12 minutes
– Total Time: 27 minutes
– Calories: 150 per cookie
Nutrition Information:
– Total Fat: 6g
– Cholesterol: 20mg
– Sodium: 100mg
– Total Carbohydrates: 22g
– Sugars: 10g
Ingredients:
– 1 cup butter, softened
– 1 cup sugar
– 1 egg
– 1 tsp vanilla extract
– 2 cups all-purpose flour
– 1 tsp baking soda
– 1 can cherry pie filling
How to Make Them:
1. Preheat your oven to 350°F (175°C) and line a baking sheet with parchment paper.
2. In a large bowl, cream together the softened butter and sugar until light and fluffy.
3. Beat in the egg and vanilla extract until well combined.
4. In a separate bowl, whisk together the flour and baking soda. Gradually add this to the wet mixture until just combined.
5. Gently fold in the cherry pie filling, being careful to keep those juicy cherry chunks intact.
6. Drop spoonfuls of dough onto your prepared baking sheet. Bake for 12 minutes, or until the edges are lightly golden.
7. Allow to cool on the baking sheet for a few minutes before transferring to a wire rack.
If you want thicker cookies, chill the dough for 30 minutes before baking.
FAQs:
– Can I use homemade cherry filling? Absolutely! Just make sure it’s well-drained to avoid soggy cookies.
These Cherry Pie Filling Cookies are perfect for any occasion. Whether you’re baking for a potluck or a cozy night in, you can’t go wrong with this easy and delicious recipe. Get ready to impress your friends and family with these bakery-quality treats!
Cherry Pie Filling Cookies
Editor’s Choice

Silicone Baking Mat, 3 Pack Reusable Baking Mat, Non-Stick, Food Safe Si…
 Amazon$9.99
Cookie Scoop Set, Include 1 Tbsp/2 Tbsp/3 Tbsp, Cookie Scoops for Baking…
 AmazonGBP 12.74
Umite Chef Mixing Bowls with Airtight Lids Set, 8PCS Stainless Steel Kha…
 Amazon$29.99
6. Cherry Pie Filling Brownies
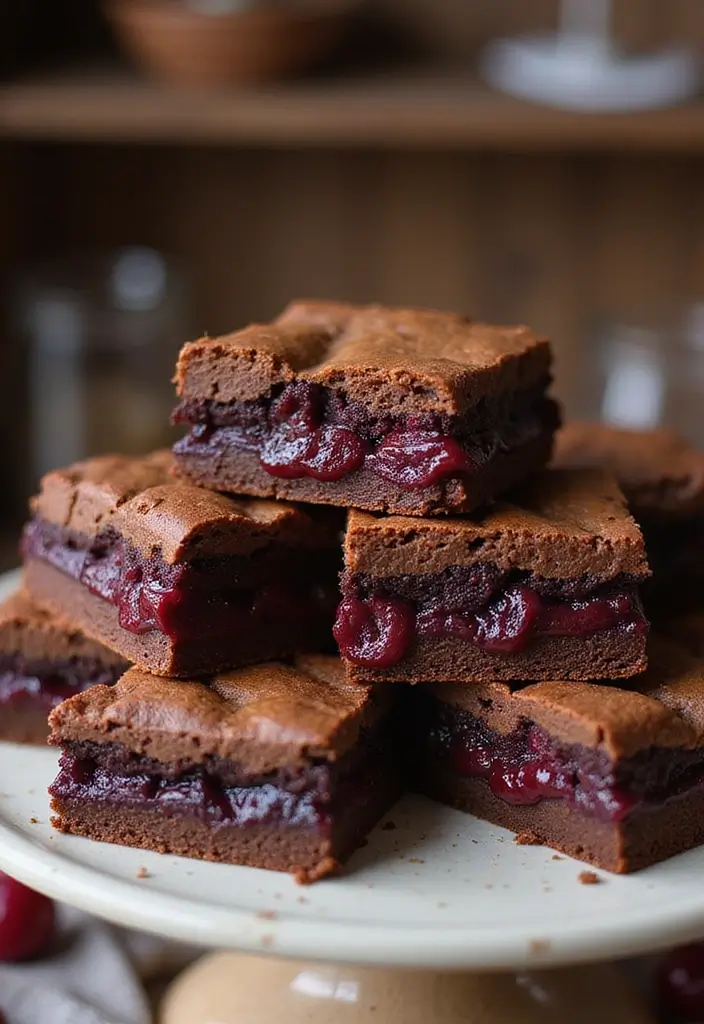
Indulge in the mouthwatering delight of Cherry Pie Filling Brownies! These brownies take your favorite chocolate treat and elevate it with a sweet, fruity twist. Imagine biting into a rich, fudgy brownie, only to discover a burst of cherry flavor in every mouthful. It’s the perfect blend for anyone who adores chocolate and cherries alike!
Recipe Overview:
– Servings: 12 brownies
– Prep Time: 10 minutes
– Cook Time: 30 minutes
– Total Time: 40 minutes
– Calories: 280 per brownie
Nutrition Information:
– Total Fat: 14g
– Cholesterol: 50mg
– Sodium: 200mg
– Total Carbohydrates: 35g
– Sugars: 20g
Ingredients:
– 1/2 cup butter
– 1 cup sugar
– 2 eggs
– 1 tsp vanilla extract
– 1/2 cup cocoa powder
– 1/2 cup all-purpose flour
– 1 can cherry pie filling
Step-by-Step Instructions:
1. Preheat your oven to 350°F (175°C) and grease an 8-inch square baking pan.
2. Melt the butter in a saucepan. Remove from heat and stir in the sugar, eggs, and vanilla.
3. Mix in the cocoa powder and flour until just combined.
4. Pour half of the brownie batter into the prepared pan.
5. Spread cherry pie filling evenly over the batter, then top with the remaining brownie batter.
6. Bake for 30 minutes, or until a toothpick comes out mostly clean.
7. Allow cooling before cutting into squares.
Enhance your serving by adding a dollop of whipped cream or a scoop of vanilla ice cream on top. This dessert isn’t just a treat; it’s a showstopper at any gathering.
FAQs:
– Can you make these brownies ahead of time? Yes, they can be stored in an airtight container for up to 3 days, so you can enjoy them whenever the craving strikes!
These brownies are not just delicious; they’re a fun and easy way to impress friends and family. With just a few simple ingredients, you can create a dessert that looks and tastes like it came straight from a bakery. Enjoy every luscious bite!
Cherry Pie Filling Brownies
Editor’s Choice

BetterBody Foods Organic Cacao Powder, Rich Chocolate Flavor, Non-GMO, G…
 Amazon$16.96
EurKitchen Professional Aluminum Whipped Cream Dispenser – Leak-Free Whi…
 Amazon$42.99
7. Cherry Pie Filling Trifle
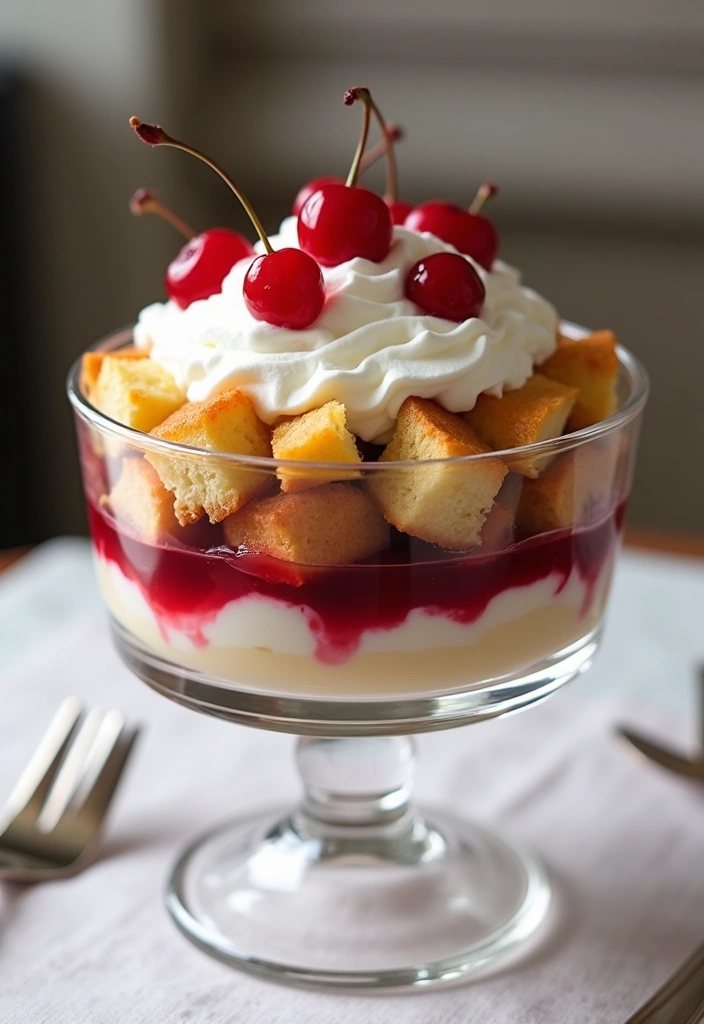
Create a showstopper at your next gathering with a delightful Cherry Pie Filling Trifle! This dessert combines layers of fluffy whipped cream, sweet cherry pie filling, and soft cake for a treat that looks as fabulous as it tastes. It’s a quick and easy option for birthdays, holidays, or potluck dinners, and it will surely impress your guests.
Let’s dive into the details. You can whip this up in just 15 minutes, and it requires no baking! Each serving is about 250 calories, making it a sweet treat that won’t ruin your diet. Perfect for any occasion, this trifle is as versatile as it is delicious.
Ingredients:
– 1 (9-inch) cake (store-bought or homemade)
– 1 can cherry pie filling
– 2 cups whipped cream
– Fresh cherries for garnish
Instructions:
1. If you’re using a homemade cake, let it cool completely before starting.
2. Cut the cake into bite-sized cubes.
3. In a trifle dish or a large bowl, layer the cake cubes, cherry pie filling, and whipped cream.
4. Repeat the layers until you run out of ingredients, finishing with a layer of whipped cream on top.
5. Top with fresh cherries for a pop of color and flavor. Refrigerate for at least one hour before serving to let the flavors meld.
For a little twist, try mixing a splash of almond extract into the whipped cream for extra flavor.
FAQ:
– Can I use pudding instead of whipped cream? Yes! Vanilla or chocolate pudding makes a tasty alternative that adds creaminess.
This Cherry Pie Filling Trifle is not just a dessert; it’s a conversation starter. With its beautiful layers and delicious flavors, it’s bound to be a hit. Enjoy making this easy trifle, and watch your guests go back for seconds!
Cherry Pie Filling Trifle
Editor’s Choice


EurKitchen Professional Aluminum Whipped Cream Dispenser – Leak-Free Whi…
 Amazon$42.99
8. Cherry Pie Filling Cupcakes
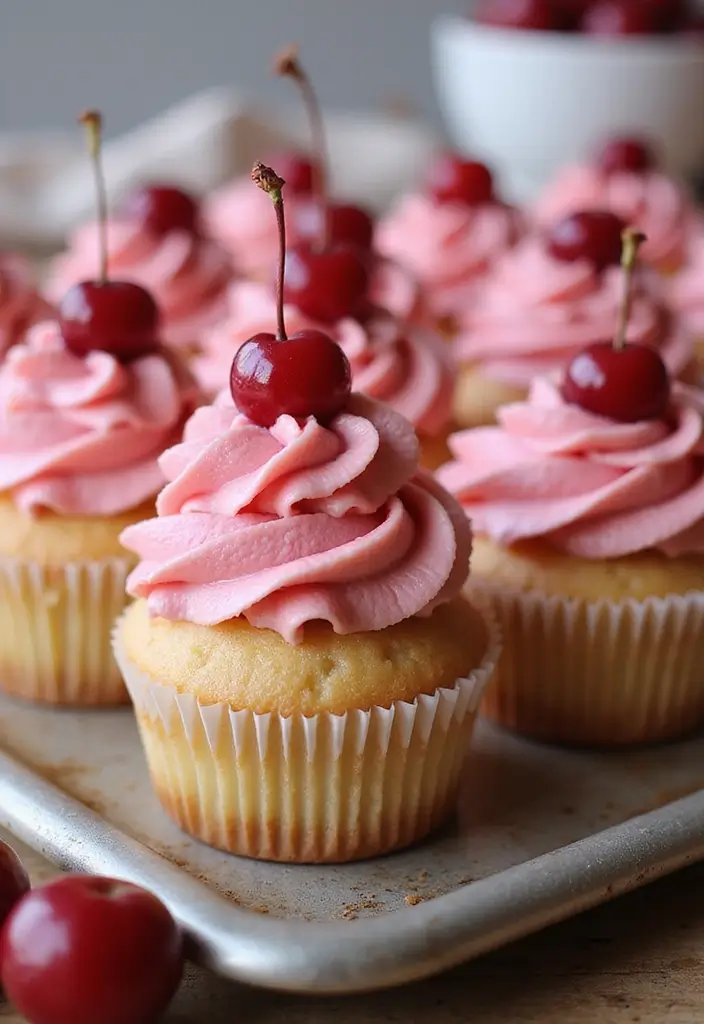
Cherry Pie Filling Cupcakes bring a delightful twist to your dessert table. Imagine sinking your teeth into a soft, fluffy cupcake bursting with the sweet and tart flavor of cherry pie filling. Topped with a creamy frosting, these treats are perfect for birthdays, picnics, or any celebration where you want to impress your guests!
Here’s what you need to know to make these scrumptious cupcakes:
Recipe Overview:
– Servings: 12 cupcakes
– Prep Time: 20 minutes
– Cook Time: 18 minutes
– Total Time: 38 minutes
– Calories: 310 per cupcake
Nutrition Information:
– Total Fat: 15g
– Cholesterol: 45mg
– Sodium: 180mg
– Total Carbohydrates: 40g
– Sugars: 25g
Ingredients:
– 1 1/2 cups all-purpose flour
– 1 cup sugar
– 1/2 cup butter, softened
– 2 eggs
– 1/2 cup milk
– 1 tsp baking powder
– 1 can cherry pie filling
– Frosting of your choice
Step-by-Step Instructions:
1. Preheat your oven to 350°F (175°C) and prepare a muffin tin with paper liners. This keeps your cupcakes from sticking.
2. In a large mixing bowl, cream together the softened butter and sugar until smooth and fluffy.
3. Beat in the eggs one at a time, mixing well after each addition.
4. Gradually stir in the flour, baking powder, and milk until just combined. Don’t overmix!
5. Fill each cupcake liner halfway with batter. Then, add a teaspoon of cherry pie filling on top. Finish by adding more batter until the liners are about 3/4 full.
6. Bake for 18 minutes, or until a toothpick inserted comes out clean.
7. Let the cupcakes cool completely before adding your favorite frosting.
Want to add a fun touch? Tint your frosting pink or red to match the cherry theme! This small detail can make your cupcakes stand out even more.
FAQs:
– Can I use chocolate frosting? Yes! Chocolate and cherry are a delicious pairing that many love.
Make these Cherry Pie Filling Cupcakes for a treat that’s sure to delight everyone. They’re easy to make and look like they came straight from a bakery!
Cherry Pie Filling Cupcakes
Editor’s Choice

Amazon Basics Nonstick Round Muffin Baking Pan, 12 Cups, Set of 2, Gray,…
 Amazon$14.97
200pcs Natural Tulip Cupcake Liners for Baking Cups Unbleached European …
 Amazon$9.97
Hamilton Beach 6-Speed Electric Hand Mixer with Whisk, Traditional Beate…
 AmazonGBP 20.97
9. Cherry Pie Filling Ice Cream
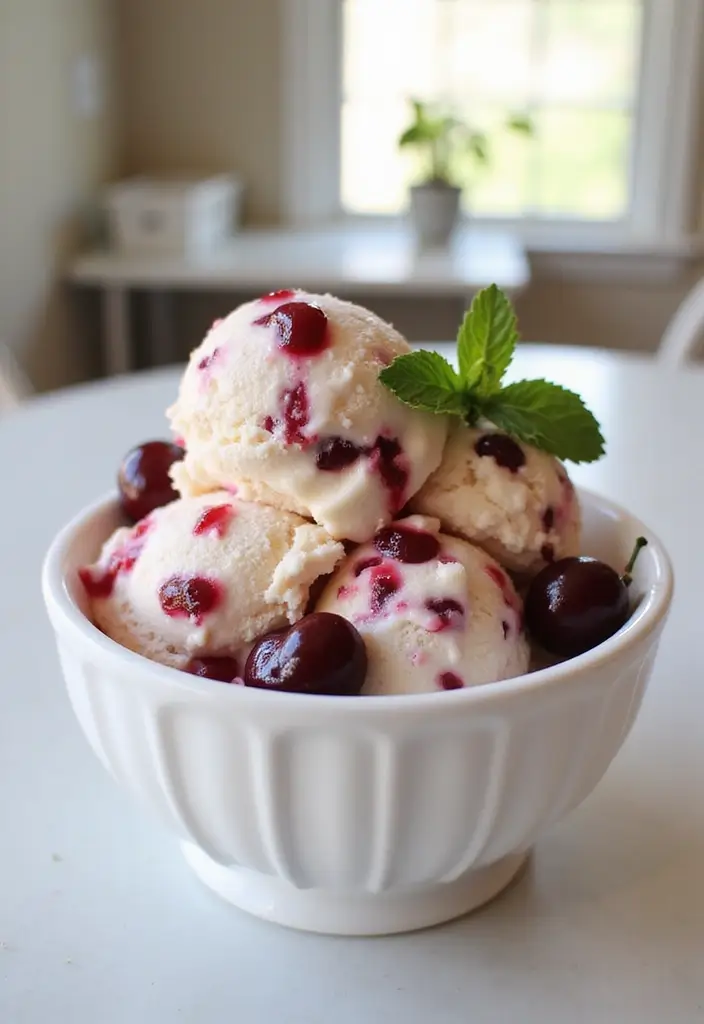
Treat yourself to a delightful homemade Cherry Pie Filling Ice Cream! This creamy dessert is a perfect way to beat the summer heat. Imagine smooth, cold ice cream with swirls of sweet cherry pie filling. It’s an irresistible blend of flavors that makes every scoop a refreshing delight.
Let’s get into the details of this simple recipe:
Recipe Overview:
– Servings: 6 servings
– Prep Time: 10 minutes
– Chill Time: 4 hours
– Total Time: 4 hours 10 minutes
– Calories: 200 per serving
Nutrition Information:
– Total Fat: 12g
– Cholesterol: 40mg
– Sodium: 90mg
– Total Carbohydrates: 25g
– Sugars: 18g
Ingredients:
– 2 cups heavy whipping cream
– 1 cup sweetened condensed milk
– 1 can cherry pie filling
Step-by-Step Instructions:
1. In a large bowl, whip the heavy cream until stiff peaks form. This will give your ice cream a light and airy texture.
2. Gently fold the sweetened condensed milk into the whipped cream. This adds sweetness and creaminess.
3. Carefully stir in half of the cherry pie filling. Be gentle so you don’t deflate the whipped cream.
4. Pour the mixture into a freezer-safe container. Swirl in the remaining cherry pie filling on top for a beautiful finish.
5. Cover and freeze for at least 4 hours, or until solid.
6. Serve scoops with extra cherry pie filling on top, if you like.
Want to enhance the flavor? Add a splash of vanilla extract for a richer taste.
FAQs:
– Is this no-churn ice cream? Yes! You don’t need an ice cream maker for this recipe, making it super easy to whip up at home.
Enjoy this homemade treat that’s perfect for warm days or any time you crave a sweet, fruity dessert!
Cherry Pie Filling Ice Cream
Editor’s Choice

Amazon Grocery, Heavy Whipping Cream, Ultra-Pasteurized, 16 Fl Oz (Previ…
 Amazon$3.37
10. Cherry Pie Filling Tarts
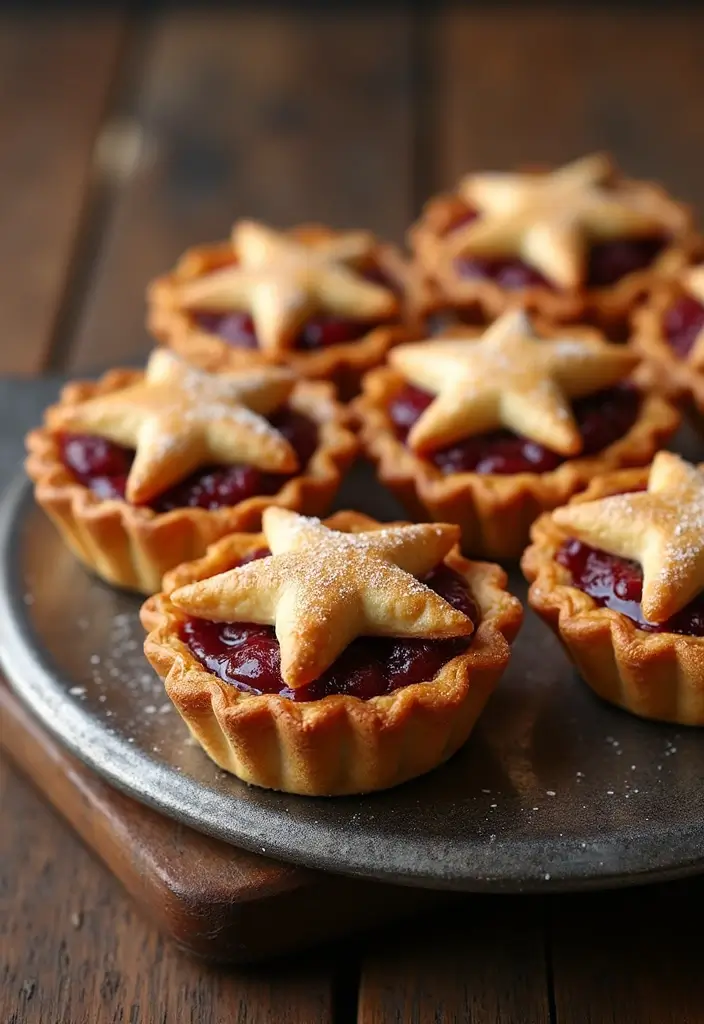
Indulge in the sweet goodness of Cherry Pie Filling Tarts! These delightful mini tarts are perfect for satisfying your sweet tooth. With a flaky, buttery crust and a generous helping of cherry filling, they look as impressive as they taste. Whether you’re hosting a gathering or enjoying a quiet night in, these tarts will surely impress your guests.
Imagine serving these gorgeous tarts at your next get-together. They are not only delicious but also a feast for the eyes! Pinterest is buzzing with similar creations, showing how desserts can be both beautiful and tasty. Each bite offers a burst of fruity flavor, making them a crowd favorite.
Let’s dive into making these tasty tarts! They’re simple and cost-effective, perfect for bakers of all levels. You can even add a splash of almond extract to the filling for a unique twist. Make your dessert table shine with these charming treats!
Ingredients:
– 1 package pie crusts (2 crusts)
– 1 can cherry pie filling
– 1 egg (for egg wash)
– Sugar for sprinkling
Instructions:
1. Preheat your oven to 375°F (190°C). Grease a muffin tin.
2. Roll out the pie crusts and use a round cutter to make circles that fit into the muffin tin cups.
3. Place the crust circles in the muffin tin and fill each with cherry pie filling.
4. Cut out fun shapes from the leftover crust and place them on top of the filling for decoration.
5. Brush the tops with beaten egg and sprinkle sugar for added crunch.
6. Bake for 25 minutes, or until they turn golden brown.
7. Allow them to cool before serving. Enjoy!
Tips:
– Add almond extract for a unique flavor.
– Store leftovers in an airtight container for up to 2 days.
– Serve with whipped cream for an extra treat!
– Experiment with other fruit fillings for variety!
These Cherry Pie Filling Tarts are sure to become a staple in your dessert rotation. They are easy to make and even easier to enjoy. Happy baking!
Cherry Pie Filling Tarts
Editor’s Choice

Marie Callender’s Frozen Pastry Pie Crusts, 16 oz (frozen)
 Amazon$5.49

Nonstick 24 Cups Mini Muffin Pan with Extended Handles for Easy Grip, Ca…
 Amazon$9.99
11. Cherry Pie Filling Smoothie
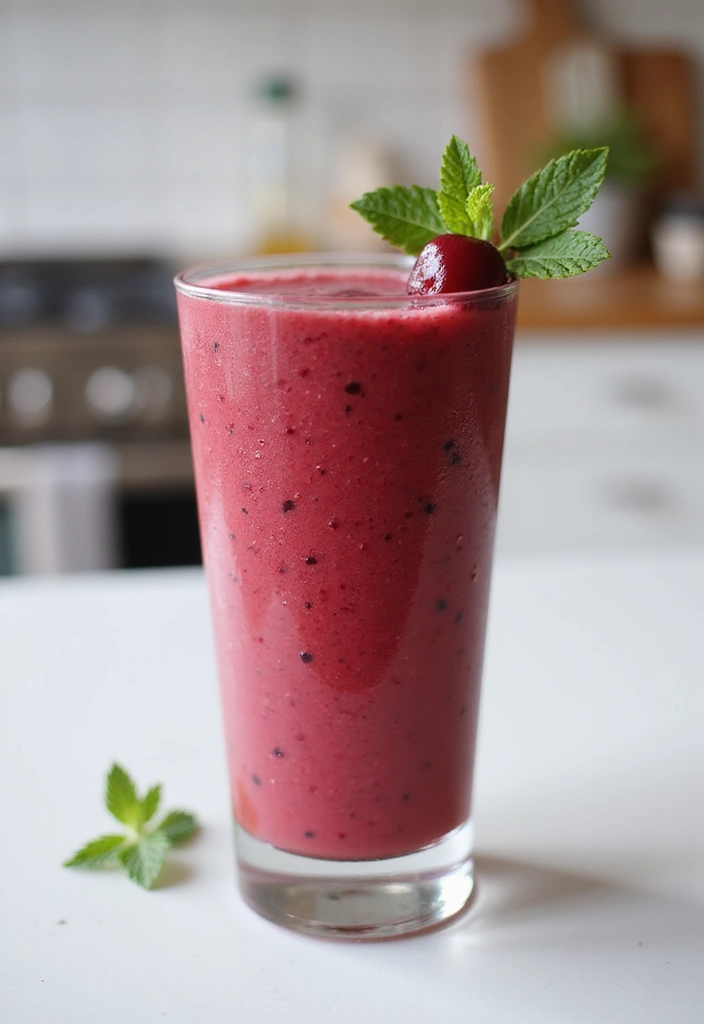
Kickstart your morning with a delightful Cherry Pie Filling Smoothie! This tasty drink combines the sweet, juicy flavor of cherries with creamy yogurt and milk. It’s a quick, nutritious way to satisfy your sweet tooth and power up your day. Imagine sipping on this refreshing smoothie while knowing you’re treating your body right!
Here’s what you need:
– Servings: 2 servings
– Prep Time: 5 minutes
– Total Time: 5 minutes
– Calories: 180 per serving
Nutrition Information:
– Total Fat: 5g
– Cholesterol: 15mg
– Sodium: 90mg
– Total Carbohydrates: 30g
– Sugars: 22g
Ingredients:
– 1 cup cherry pie filling
– 1 cup yogurt (plain or vanilla)
– 1/2 cup milk
– Ice cubes (optional)
Step-by-Step Instructions:
1. In a blender, mix together the cherry pie filling, yogurt, and milk.
2. If you like your smoothie extra cold, toss in some ice cubes. Blend until smooth.
3. Pour the smoothie into glasses and enjoy immediately.
You can swap the yogurt for almond milk if you prefer a dairy-free version.
FAQs:
– *Can I add greens like spinach or kale?* Yes! Tossing in a handful of spinach or kale gives your smoothie an extra health boost without changing the taste much.
This Cherry Pie Filling Smoothie is not just delicious; it’s also versatile. You can play around with flavors and textures depending on what you have on hand. Enjoy it as a quick breakfast or a refreshing snack any time of the day!
Cherry Pie Filling Smoothie
Editor’s Choice

Ninja BL660 Professional Compact Smoothie & Food Processing Blender, 110…
 Amazon$99.99
Duncan Hines Comstock Original Pie Filling & Topping, Country Cherry, 21…
 Amazon$33.92

Amazon Grocery, Low Fat Plain Yogurt, 32 Oz (Previously Amazon Fresh, Pa…
 Amazon$2.76
12. Cherry Pie Filling Crepes
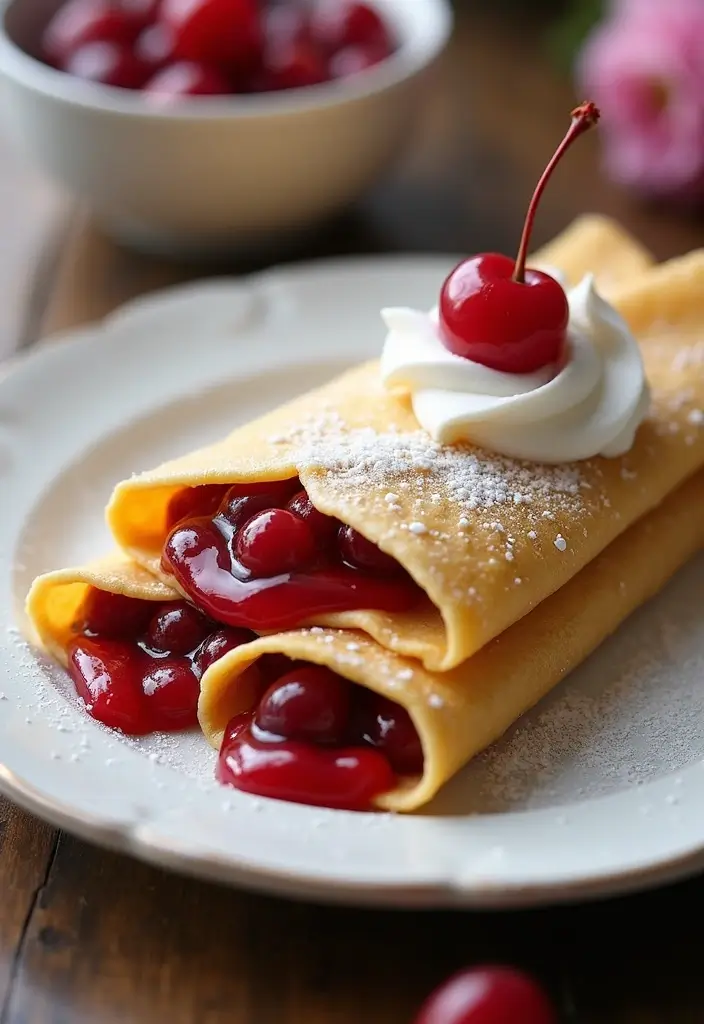
Treat yourself to a delightful breakfast or dessert with Cherry Pie Filling Crepes! These light and tender crepes are perfect for showcasing the sweet, juicy cherry filling. Whether you drizzle them with whipped cream or dust them with powdered sugar, they look and taste like they came straight from a bakery.
Here’s how to make these delicious crepes at home. You don’t need fancy equipment or skills—just a few simple ingredients and a bit of love. This recipe serves four, making it ideal for family gatherings or brunch with friends. Let’s dig into the details!
Recipe Overview:
– Servings: 4
– Prep Time: 20 minutes
– Cook Time: 15 minutes
– Total Time: 35 minutes
– Calories: 220 per serving
Nutrition Information:
– Total Fat: 8g
– Cholesterol: 50mg
– Sodium: 200mg
– Total Carbohydrates: 30g
– Sugars: 10g
Ingredients:
– 1 cup all-purpose flour
– 2 eggs
– 1 1/2 cups milk
– 1/4 tsp salt
– 1 tbsp sugar
– 1 can cherry pie filling
– Whipped cream for topping
Step-by-Step Instructions:
1. In a large bowl, whisk together the flour, eggs, milk, salt, and sugar until the mixture is smooth and lump-free.
2. Heat a non-stick skillet over medium heat. Pour in about 1/4 cup of the batter, swirling the pan to cover the bottom evenly.
3. Cook until the edges start to lift, then flip the crepe and cook for an additional minute.
4. Once cooked, fill each crepe with a generous spoonful of cherry pie filling. Fold or roll them up as you like.
5. Serve warm, topped with a dollop of whipped cream. If you want to impress, sprinkle some powdered sugar on top just before serving.
FAQs:
– Can I make crepes ahead of time? Yes, you can! Just stack them with parchment paper in between to keep them from sticking together.
This recipe is not just about taste; it’s a chance to create a wonderful moment. Enjoy the process and share your delicious results with loved ones!
Cherry Pie Filling Crepes
Editor’s Choice

SENSARTE Nonstick Crepe Pan, Swiss Granite Coating Dosa Pan Pancake Flat…
 Amazon$25.99
EurKitchen Professional Aluminum Whipped Cream Dispenser – Leak-Free Whi…
 Amazon$42.99
200Pcs Parchment Paper,12×16 Inches Non-Stick Precut Parchment Paper She…
 Amazon$9.89
13. Cherry Pie Filling Energy Bites
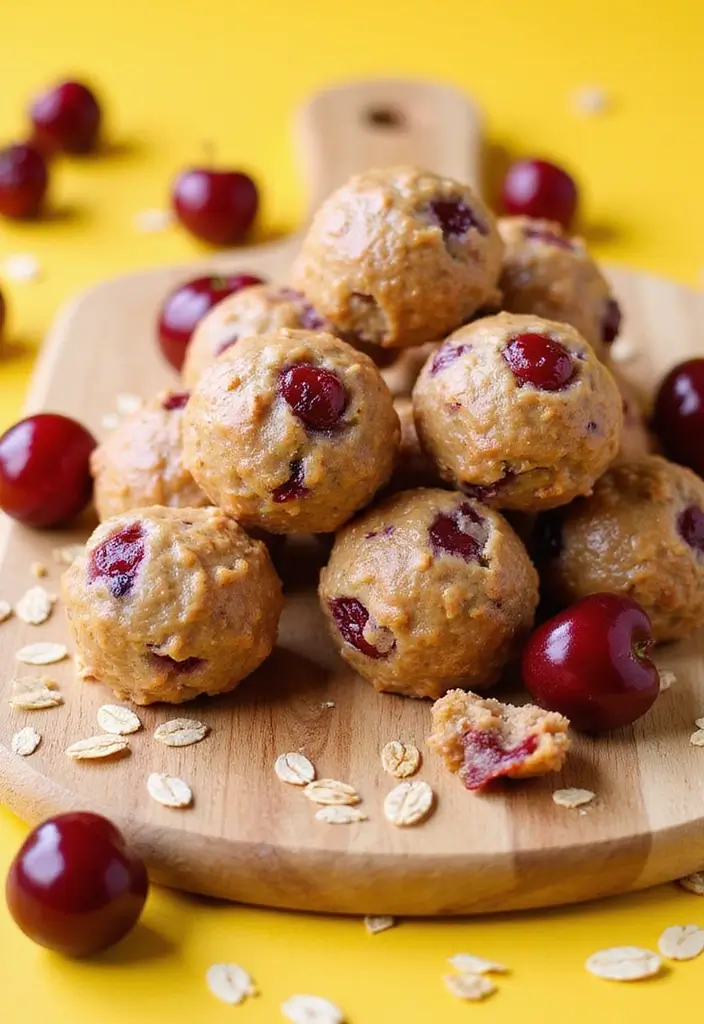
Tired of snacks that leave you sluggish? Try these delicious Cherry Pie Filling Energy Bites! They’re a fun, bite-sized treat that packs a punch of flavor and energy. Imagine the sweet taste of cherry pie, but in a healthy, portable form. Perfect for busy days or a pick-me-up between meals, these energy bites are your new go-to snack.
Let’s dive into how easy they are to make. In just 10 minutes, you can whip up a batch. With ingredients like rolled oats, nut butter, and cherry pie filling, you get a wholesome snack that satisfies your sweet tooth, too.
Here’s what you need:
Ingredients:
– 1 cup rolled oats
– 1/2 cup nut butter (choose peanut or almond)
– 1/2 cup cherry pie filling
– 1/4 cup honey or maple syrup
Instructions:
1. Start by mixing all the ingredients in a bowl. Make sure everything is well combined.
2. Use your hands to shape the mixture into small balls.
3. Place these bites on a parchment-lined tray and refrigerate for about 30 minutes to firm them up.
4. Store your energy bites in an airtight container in the fridge for up to a week.
Feeling adventurous? Add some seeds or chocolate chips for an extra flavor boost!
FAQs:
– Can I freeze these bites? Yes, they freeze well for up to a month.
These Cherry Pie Filling Energy Bites are not just tasty; they’re also a quick and healthy way to keep your energy levels up. Enjoy them after a workout, during a busy workday, or as a satisfying treat any time you need a little sweetness in your life.
Cherry Pie Filling Energy Bites
Editor’s Choice

Bob’s Red Mill Gluten Free Old Fashioned Rolled Oats, 32oz (Pack of 4) -…
 Amazon$23.92
14. Cherry Pie Filling Pop Tarts
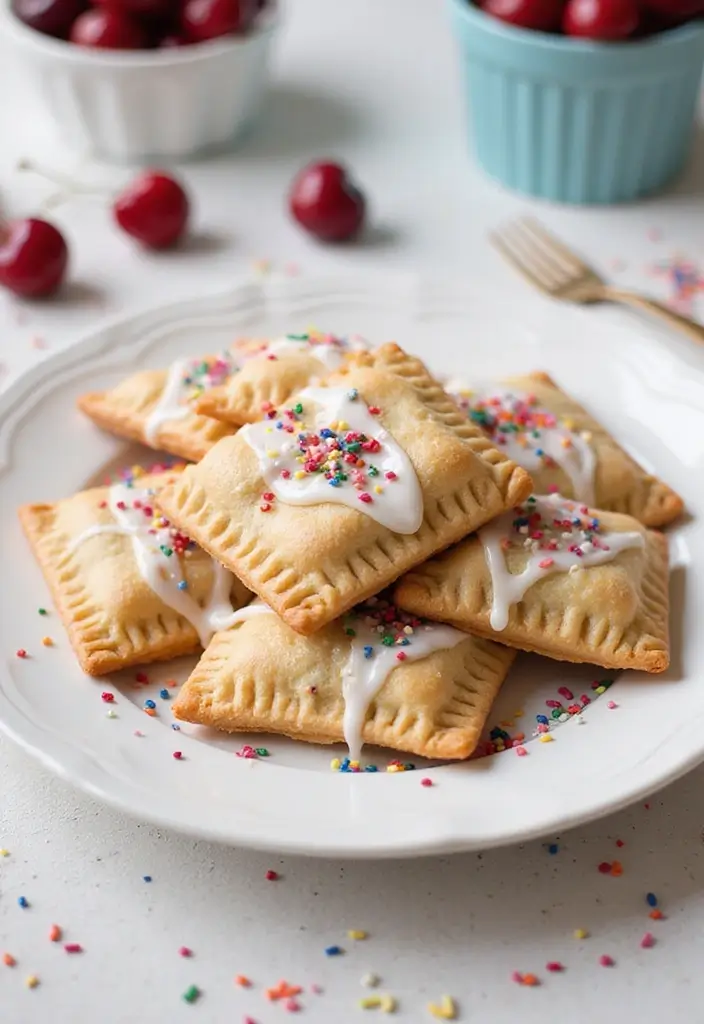
Create a delightful twist on a classic favorite with Homemade Cherry Pie Filling Pop Tarts. These treats bring back childhood memories, combining flaky pastry with a sweet cherry filling. Topped with a simple glaze and colorful sprinkles, they are perfect as a breakfast treat or an afternoon snack. Plus, they look so good, you’ll feel like you’re biting into a bakery masterpiece!
Here’s what you need to know:
– Servings: 8 pop tarts
– Prep Time: 20 minutes
– Cook Time: 25 minutes
– Total Time: 45 minutes
– Calories: 260 per pop tart
Nutrition Facts:
– Total Fat: 12g
– Cholesterol: 40mg
– Sodium: 200mg
– Total Carbohydrates: 32g
– Sugars: 15g
Ingredients:
– 1 package refrigerated pie crusts (or make your own)
– 1 can cherry pie filling
– 1 cup powdered sugar
– 2 tbsp milk
– Sprinkles for decoration
Instructions:
1. Preheat your oven to 400°F (204°C) and line a baking sheet with parchment paper.
2. Roll out the pie crusts and cut them into rectangles.
3. Spoon a dollop of cherry pie filling onto half of the rectangles. Top with another rectangle and seal the edges with a fork.
4. Bake for 25 minutes or until golden brown.
5. For the glaze, combine powdered sugar and milk until smooth, then drizzle over the pop tarts.
6. Sprinkle with your favorite toppings if you like a festive flair.
Want to elevate the flavor? Add a splash of almond extract to the cherry filling for an extra depth of taste.
FAQs:
– Can I make these ahead? Yes, store them in an airtight container for up to 3 days, and they’ll stay fresh!
These Cherry Pie Filling Pop Tarts are not just tasty; they’re a fun project to make with family or friends. Enjoy the process, and savor each bite of nostalgia!
Cherry Pie Filling Pop Tarts
Editor’s Choice

Mrs. Anderson’s Baking Pie Crust Protector Shield, Fits 9.5 and 10-Inch …
 Amazon$17.57
365 by Whole Foods Market, Organic Powdered Sugar, 24 Ounce
 Amazon$5.79
360 Count 12″x 16″ Heavy Duty Parchment Paper Sheets for Baking, No-Stic…
 Amazon$24.99
15. Cherry Pie Filling Bread Pudding
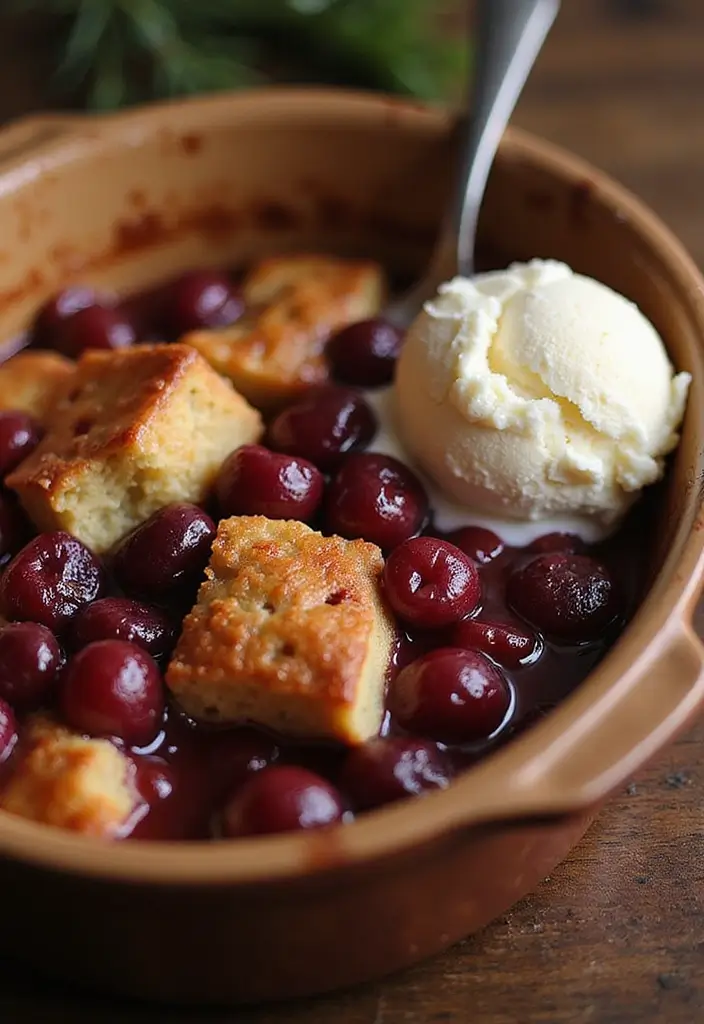
Imagine a warm, comforting dessert that brings back memories of cozy family gatherings. Cherry Pie Filling Bread Pudding is just that! This delightful dish transforms leftover bread into a rich treat, bursting with the sweet and tart flavor of cherry pie filling. Topped with a scoop of vanilla ice cream, it’s a dessert that feels like a warm hug on a chilly evening.
Here’s what you need to know:
– Servings: 8
– Prep Time: 15 minutes
– Cook Time: 45 minutes
– Total Time: 1 hour
– Calories: Approximately 300 per serving
Nutrition Information:
– Total Fat: 12g
– Cholesterol: 80mg
– Sodium: 250mg
– Total Carbohydrates: 45g
– Sugars: 18g
Ingredients:
– 4 cups cubed bread (stale works best)
– 1 can cherry pie filling
– 4 large eggs
– 2 cups milk
– 1/2 cup sugar
– 1 tsp vanilla extract
Step-by-Step Instructions:
1. Preheat your oven to 350°F (175°C). Grease a 9×13-inch baking dish.
2. Spread the cubed bread evenly in the dish. Pour the cherry pie filling on top, ensuring the bread is well-covered.
3. In a separate bowl, whisk together the eggs, milk, sugar, and vanilla until smooth.
4. Pour this egg mixture over the bread and cherry filling. Gently stir to combine, making sure the bread absorbs the mixture.
5. Bake for 45 minutes. The pudding should be set, and the top should turn golden brown.
6. Let it cool for a few minutes before serving. Enjoy it warm with a scoop of ice cream on top for an extra treat!
Pro Tip: Sprinkle a little cinnamon on top before baking for an added layer of flavor.
FAQs:
– Can I use different fruits? Absolutely! You can swap in blueberries, peaches, or any fruit you love. Get creative!
This recipe is not only delicious but also a great way to minimize food waste. So, gather your ingredients and make a dessert that will impress everyone. Enjoy your cherry pie filling bread pudding!
Cherry Pie Filling Bread Pudding
Editor’s Choice

Pyrex Deep 9×13-Inch Glass Baking Dish with Lid, Deep Casserole Dish, Gl…
 Amazon$28.56
Watkins All Natural Original Gourmet Baking Vanilla, with Pure Vanilla E…
 Amazon$12.35
Amazon Grocery, Ground Cinnamon, 2.5 Oz (Previously Happy Belly, Packagi…
 Amazon$1.03
16. Cherry Pie Filling Rice Pudding
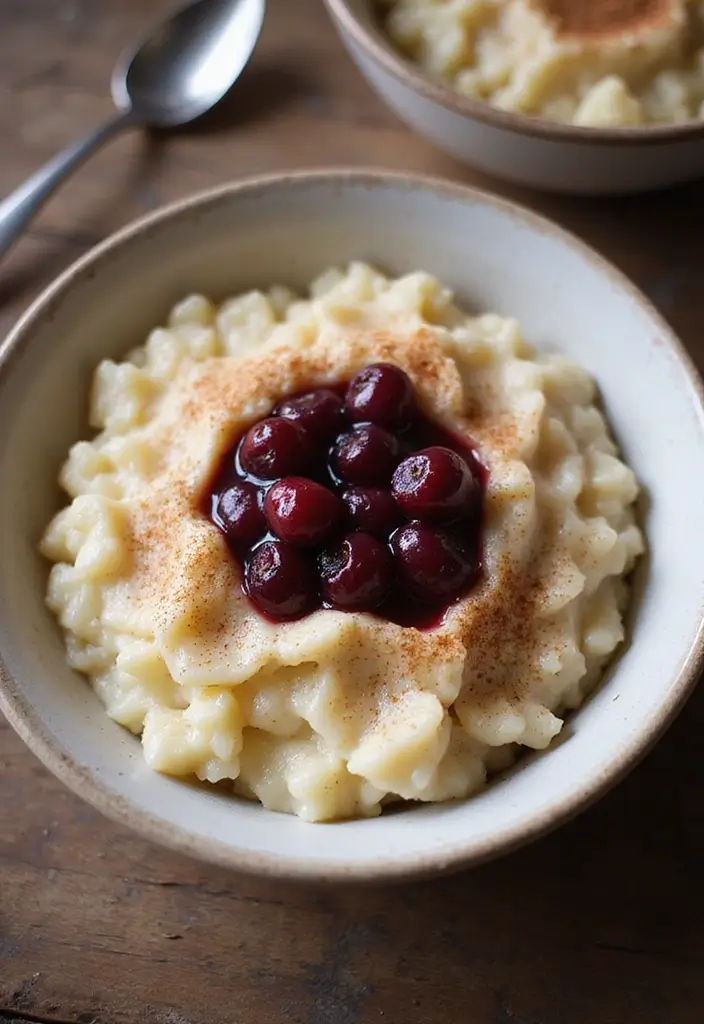
Indulge your sweet tooth and relive childhood memories with Cherry Pie Filling Rice Pudding! This creamy dessert combines leftover rice with luscious cherry pie filling for a delightful treat that’s sure to impress. Whether it’s a special occasion or a cozy night in, this pudding is a comforting dish that brings warmth to any table.
Imagine the rich, sweet flavors dancing on your taste buds as you take a spoonful of this pudding. It’s simple to make and requires just a few ingredients you likely already have at home. Plus, it’s an excellent way to use up that leftover rice. Let’s get to the recipe!
Recipe Overview:
– Servings: 4
– Prep Time: 10 minutes
– Cook Time: 20 minutes
– Total Time: 30 minutes
– Calories: 220 per serving
Nutrition Information:
– Total Fat: 5g
– Cholesterol: 25mg
– Sodium: 90mg
– Total Carbohydrates: 45g
– Sugars: 20g
Ingredients:
– 2 cups cooked rice
– 1 can cherry pie filling
– 2 cups milk
– 1/4 cup sugar
– 1 tsp vanilla extract
Step-by-Step Instructions:
1. In a saucepan, mix the cooked rice, milk, sugar, and vanilla. Heat on medium.
2. Stir frequently until the mixture is warm and creamy.
3. Add the cherry pie filling and stir until heated through.
4. Serve warm or chilled. For an extra touch, sprinkle some cinnamon on top if you like.
Want to change it up? Try using arborio rice for a creamier texture.
FAQs:
– Can I make this ahead of time? Yes, it stores well in the fridge for a few days.
This Cherry Pie Filling Rice Pudding is not just a dessert; it’s a sweet hug in a bowl. Enjoy every bite and let the nostalgia wash over you!
Fun fact: use 2 cups cooked rice and 1 cup cherry pie filling to whip a creamy pudding in under 20 minutes. This simple trick makes one of the recipes with cherry pie filling feel bakery-perfect with just a few ingredients.
Cherry Pie Filling Rice Pudding
Editor’s Choice

Duncan Hines Comstock Original Pie Filling & Topping, Country Cherry, 21…
 Amazon$33.92
RiceSelect Arborio Rice for Italian Risotto, Premium Gluten-Free Rice, N…
 Amazon$5.99
Vanilla Extract / 1.7 fl. oz / 50 ml, 100% natural / Made with Madagasca…
 AmazonCheck Price
17. Cherry Pie Filling Galette
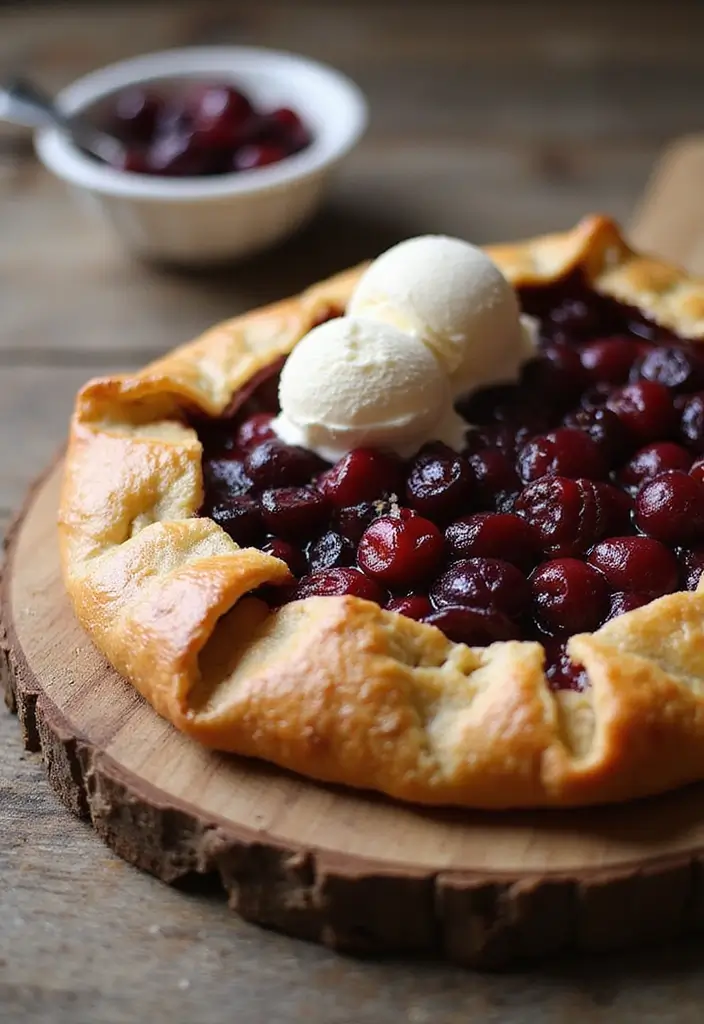
Imagine serving a dessert that looks as delightful as it tastes. A Cherry Pie Filling Galette is just that. This rustic, free-form pastry wraps around a sweet cherry filling, creating a beautiful centerpiece for your table. It’s simple enough for any home cook, yet elegant enough to impress your guests at dinner parties.
Here’s a quick overview of this delectable treat:
– Servings: 8
– Prep Time: 15 minutes
– Cook Time: 35 minutes
– Total Time: 50 minutes
– Calories: 280 per serving
Nutrition Information:
– Total Fat: 14g
– Cholesterol: 30mg
– Sodium: 150mg
– Total Carbohydrates: 35g
– Sugars: 18g
Ingredients:
– 1 package pie crusts (2 crusts)
– 1 can cherry pie filling
– 1 egg (for egg wash)
– Sugar for sprinkling
Step-by-Step Instructions:
1. Preheat your oven to 375°F (190°C) and line a baking sheet with parchment paper.
2. Roll out one pie crust into a large circle and place it on the baking sheet.
3. Spoon the cherry pie filling into the center, leaving a border around the edges.
4. Fold the edges over the filling, pleating as you go to create a rustic look.
5. Brush the crust with beaten egg and sprinkle with sugar for a sweet touch.
6. Bake for 35 minutes or until the crust is golden brown and the filling is bubbling.
7. Allow it to cool slightly before slicing and serving.
Serve it warm with a scoop of vanilla ice cream for a truly decadent experience.
FAQs:
– Can I use other fruits? Absolutely! This galette works wonderfully with apples, peaches, or even mixed berries. Just adjust the sugar if the fruits vary in sweetness.
Try making this galette for your next gathering. Its effortless charm will make everyone believe you spent hours in the kitchen!
Cherry Pie Filling Galette
Editor’s Choice

Amazon Basics Silicone Rectangular Baking Mat, Non-Stick Reusable Oven B…
 AmazonEUR 14.51
Pastry Cutter, Biscuit Cutter, Dough Scraper, Silicone Baking Mats, Stai…
 Amazon$19.99
Mora Ceramic Deep Fluted Pie Dish for Baking – 9 inch Porcelain Pie Plat…
 Amazon$27.99
18. Cherry Pie Filling Parfait
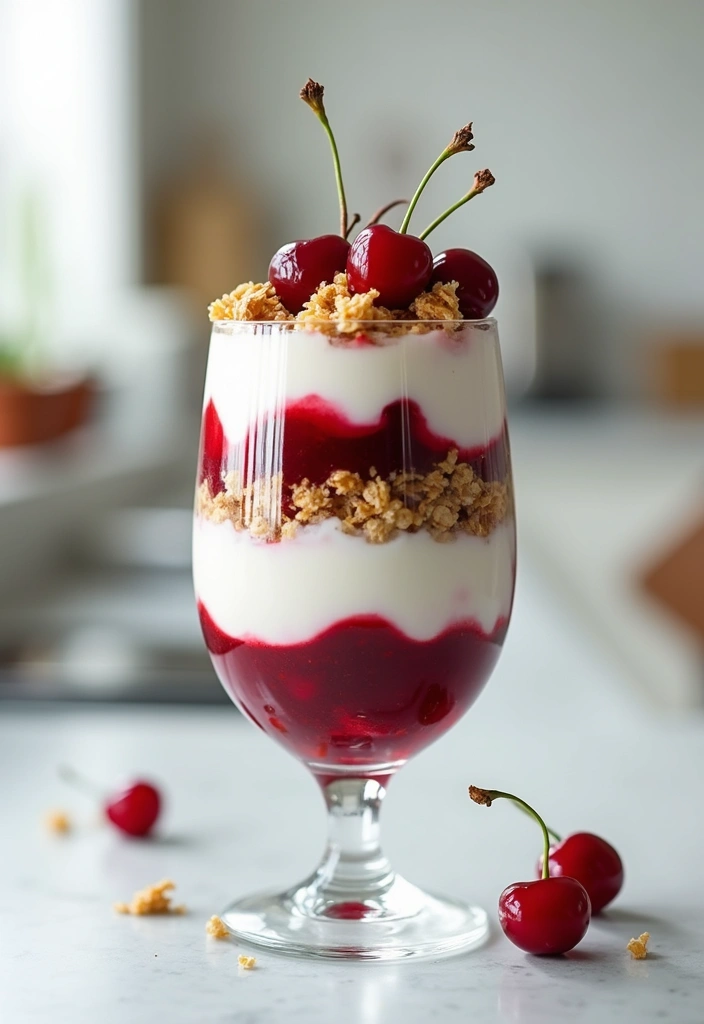
Indulge in the beautifully layered Cherry Pie Filling Parfait, a dessert that’s as pleasing to the eyes as it is to the taste buds. This parfait combines creamy yogurt or fluffy whipped cream with sweet cherry pie filling and crunchy granola. Each spoonful delivers a delightful mix of textures, making it an ideal treat for any gathering or a simple evening at home.
You can whip this up in just 10 minutes, which makes it perfect for last-minute dessert cravings or impressing guests. It’s a great way to enjoy the vibrant flavor of cherries without the fuss of baking. Plus, it looks stunning in clear glasses, showcasing all those colorful layers.
Recipe Overview:
– Servings: 4
– Prep Time: 10 minutes
– Total Time: 10 minutes
– Calories: 210 per serving
Nutrition Information:
– Total Fat: 8g
– Cholesterol: 10mg
– Sodium: 70mg
– Total Carbohydrates: 30g
– Sugars: 18g
Ingredients:
– 2 cups yogurt (choose vanilla or plain)
– 1 can cherry pie filling
– 1 cup granola
– Fresh cherries for garnish
Step-by-Step Instructions:
1. Grab your serving glasses and start by adding a layer of yogurt.
2. Follow this with a layer of cherry pie filling.
3. Sprinkle a layer of granola on top for crunch.
4. Repeat these layers until the glasses are full, making sure to finish with yogurt on top.
5. Top each parfait with a fresh cherry for a pop of color and flavor.
6. Serve immediately for the best texture!
For a healthier option, swap regular yogurt for Greek yogurt. This simple change boosts the protein while still delivering that delightful creaminess.
FAQs:
– Can I prepare these in advance?
You can prep the yogurt, cherry filling, and granola separately. Just layer them in the glasses right before serving to keep everything crisp and fresh.
With its quick preparation and gorgeous presentation, the Cherry Pie Filling Parfait is sure to be a hit. Enjoy this easy yet elegant dessert that brings a taste of the bakery right to your table!
Cherry Pie Filling Parfait
Editor’s Choice

yarlung 9 Pack Small Glass Dessert Bowls, 8 Oz Custard Cup Clear Pudding…
 Amazon$21.99
Oatsome Granola Variety Pack – Berry Coconut (6g Protein), Vanilla Almon…
 AmazonCheck Price
365 By Whole Foods Market, Greek Yogurt, Plain Nonfat, 32 Ounce
 Amazon$4.59
19. Cherry Pie Filling Chocolate Cake
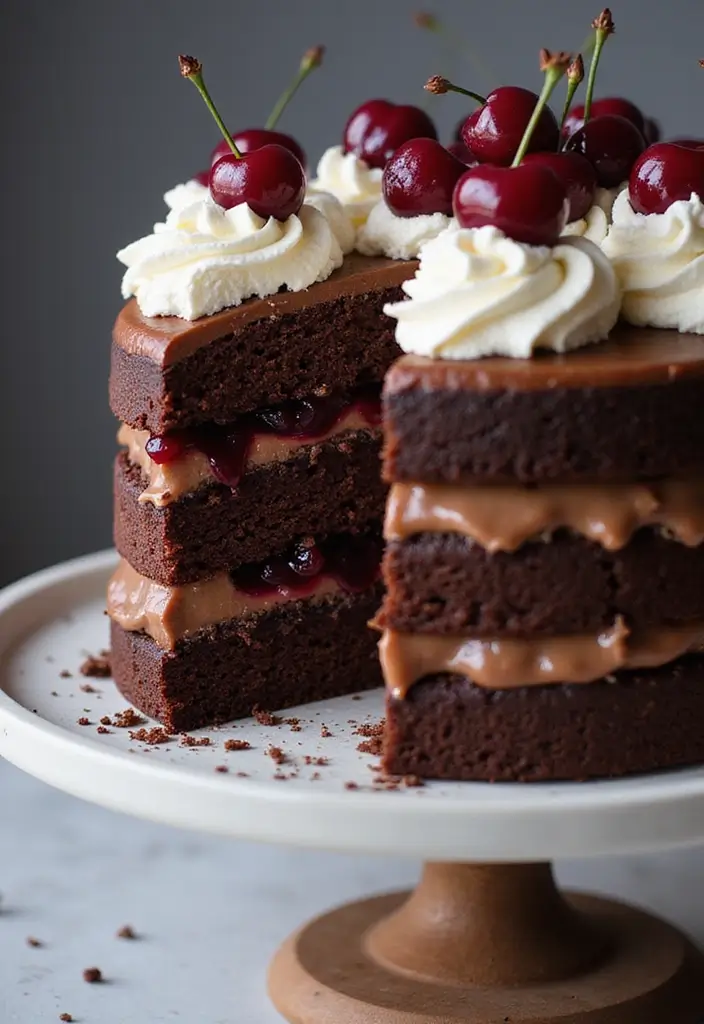
Treat yourself to a slice of heaven with a Cherry Pie Filling Chocolate Cake! This dessert combines the rich taste of chocolate with the tart sweetness of cherry pie filling. It’s a fantastic choice for any occasion and is sure to impress your guests. Picture a moist, chocolatey cake filled with bursts of cherry goodness. It pairs perfectly with a dollop of whipped cream or a scoop of vanilla ice cream for an extra indulgence.
Here’s a quick look at the recipe:
– Servings: 12 slices
– Prep Time: 20 minutes
– Cook Time: 30 minutes
– Total Time: 50 minutes
– Calories: 350 per slice
Nutrition Information:
– Total Fat: 15g
– Cholesterol: 60mg
– Sodium: 300mg
– Total Carbohydrates: 50g
– Sugars: 25g
Ingredients:
– 1 3/4 cups all-purpose flour
– 1 cup granulated sugar
– 3/4 cup unsweetened cocoa powder
– 2 tsp baking powder
– 1 tsp baking soda
– 1 tsp salt
– 2 large eggs
– 1 cup buttermilk
– 1/2 cup vegetable oil
– 1 can cherry pie filling
– 1 tsp vanilla extract
Instructions:
1. Preheat your oven to 350°F (175°C) and prepare two 9-inch round cake pans by greasing them.
2. In a big bowl, mix together the flour, sugar, cocoa powder, baking powder, baking soda, and salt.
3. In another bowl, whisk the eggs, buttermilk, oil, and vanilla until smooth.
4. Gradually combine the wet ingredients with the dry mix until just blended. Then, gently fold in the cherry pie filling.
5. Pour the batter evenly into the prepared pans. Bake for 30 minutes or until a toothpick inserted in the center comes out clean.
6. Let the cakes cool completely before frosting with your favorite chocolate frosting.
Want to add an extra cherry touch? Top the cake with more cherry pie filling for a beautiful finish!
FAQs:
– Can I use a different frosting? Absolutely! Cream cheese frosting is a fantastic alternative and adds a nice tangy flavor.
This Cherry Pie Filling Chocolate Cake is not just a dessert; it’s a delightful experience for your taste buds. Enjoy baking and savoring each bite!
If you crave bakery-worthy treats, embrace recipes with cherry pie filling as your shortcut to wow. Swirl the filling into chocolate cake batter, bake until glossy, and top with whipped cream for an easy, show-stopping dessert at home.
Cherry Pie Filling Chocolate Cake
Editor’s Choice

8″ Round Cake Pan, 3PCS Nonstick Cake Pans with 100 PCS Parchment Paper,…
 Amazon$16.99

Hamilton Beach 6-Speed Electric Hand Mixer with Whisk, Traditional Beate…
 Amazon$27.95
20. Cherry Pie Filling Sweet Rolls
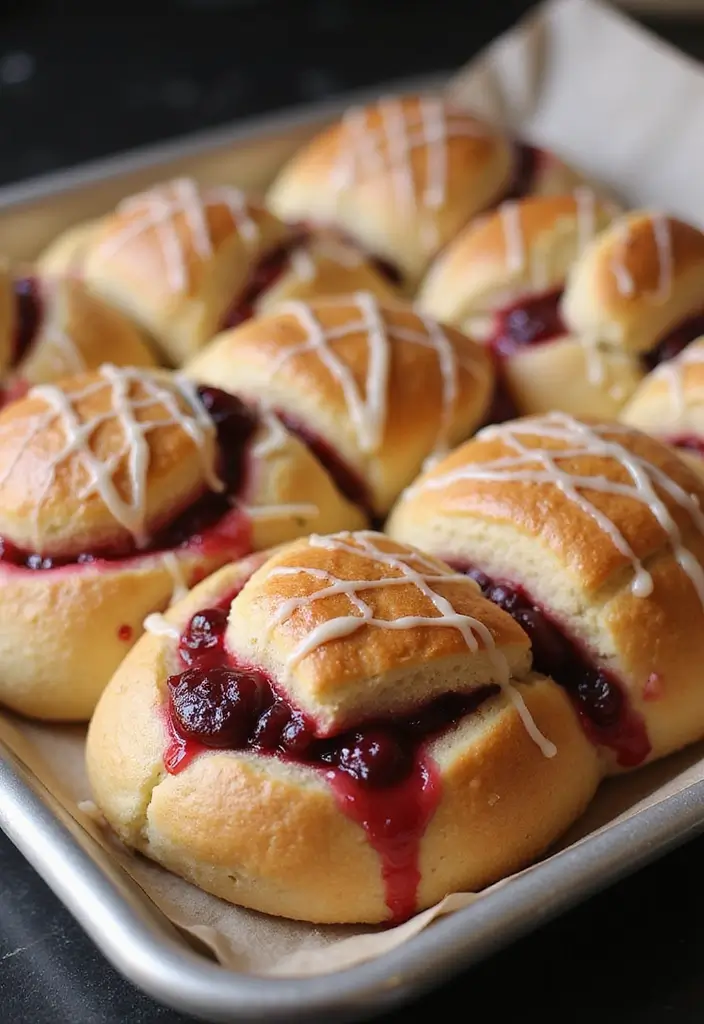
Indulge your mornings with Cherry Pie Filling Sweet Rolls! These delightful rolls combine soft, fluffy dough with a sweet cherry filling, topped with a drizzle of icing. Imagine biting into one as it gently pulls apart, releasing that sweet, fruity aroma. Perfect for breakfast or brunch, they’re sure to bring smiles to your table!
Let’s break down how to make these bakery-style rolls at home. Here’s what you’ll need:
Ingredients:
– 2 1/4 cups all-purpose flour
– 1/4 cup sugar
– 1 packet instant yeast
– 1/2 cup milk, warmed
– 1/3 cup butter, melted
– 1 egg
– 1 can cherry pie filling
– Icing for drizzling
Step-by-Step Instructions:
1. In a large bowl, combine flour, sugar, and instant yeast.
2. Warm the milk slightly and mix it with melted butter and the egg.
3. Pour the wet ingredients into the dry mix, stirring until a dough forms.
4. Knead the dough on a floured surface until smooth, about 5 minutes.
5. Place the dough in a greased bowl, cover it, and let it rise for 1 hour or until it doubles in size.
6. Roll out the dough into a rectangle and spread the cherry pie filling evenly on top.
7. Roll the dough tightly from one end to the other and slice it into 12 equal pieces.
8. Arrange the rolls in a greased baking dish, cover, and allow them to rise for another 30 minutes.
9. Bake in a preheated oven at 350°F (175°C) for 25 minutes or until golden brown.
10. Once they cool slightly, drizzle with icing and serve warm.
Enjoy these rolls fresh out of the oven for the best flavor! You can even freeze any leftovers for a quick treat later.
FAQs:
– Can I freeze these rolls? Yes! They freeze well and can be reheated for a tasty breakfast or snack.
Make your mornings special with these Cherry Pie Filling Sweet Rolls. You’ll love how easy they are to make and the joy they bring to your breakfast table!
Cherry Pie Filling Sweet Rolls
Editor’s Choice

Amazon Grocery, All Purpose Flour, 5 Lb (Previously Amazon Fresh, Packag…
 Amazon$2.50
Scratch Gold Yeast – Instant Dry Yeast for a Rapid Rise – Add Straight t…
 Amazon$9.65
DOWAN Casserole Dish, 9×13 Ceramic Baking Dish, Large Lasagna Pan Deep f…
 Amazon$29.99
21. Cherry Pie Filling Sour Cream Cake
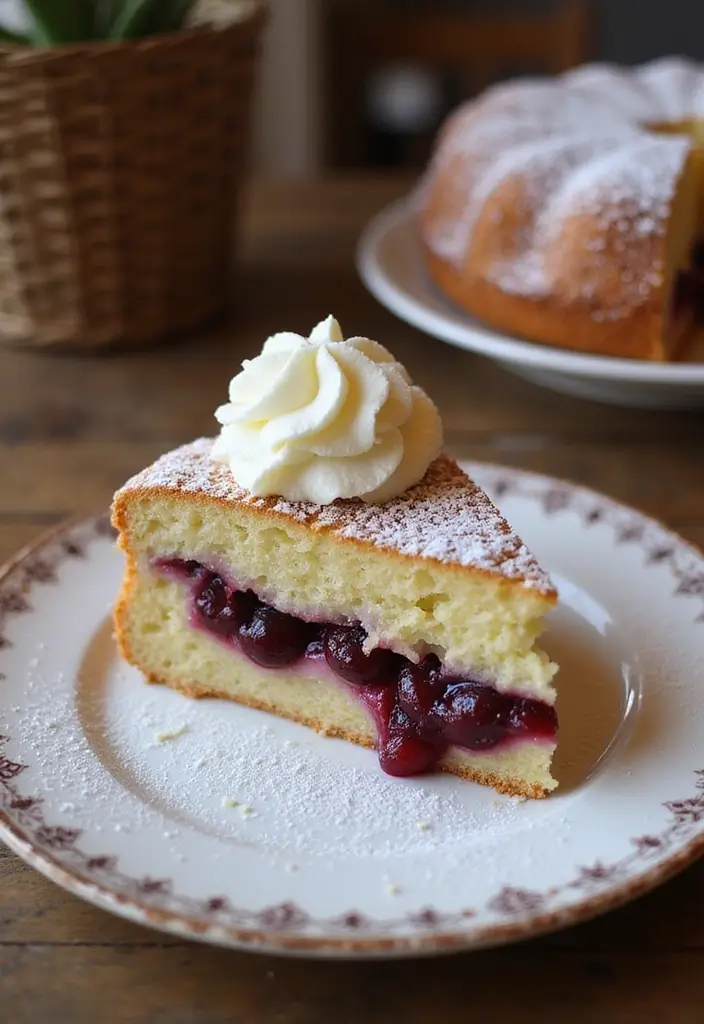
Imagine a cake that’s not only soft and moist but also bursts with the sweet tang of cherry flavor. That’s exactly what you get with this Cherry Pie Filling Sour Cream Cake! The secret ingredient, sour cream, makes the cake incredibly tender, while the cherry pie filling adds a delightful sweetness. This easy-to-make dessert is sure to wow your friends and family at any gathering.
Ready to impress? Here’s what you need to know:
Recipe Overview:
– Servings: 10 slices
– Prep Time: 15 minutes
– Cook Time: 35 minutes
– Total Time: 50 minutes
– Calories: 260 per slice
Nutrition Information:
– Total Fat: 12g
– Cholesterol: 40mg
– Sodium: 150mg
– Total Carbohydrates: 35g
– Sugars: 20g
Ingredients:
– 1 cup butter, softened
– 1 1/2 cups sugar
– 3 eggs
– 1 tsp vanilla extract
– 2 cups all-purpose flour
– 1 tsp baking powder
– 1 cup sour cream
– 1 can cherry pie filling
Step-by-Step Instructions:
1. Preheat your oven to 350°F (175°C). Grease a 9×13-inch baking dish to prevent sticking.
2. In a large bowl, cream the softened butter and sugar until fluffy. This should take about 3-4 minutes.
3. Add the eggs, one at a time, mixing well after each addition. Then, stir in the vanilla extract.
4. Gradually mix in the flour and baking powder until just combined. Fold in the sour cream for that extra moisture.
5. Pour half of the batter into the prepared dish. Carefully spread the cherry pie filling over the batter, then top with the remaining batter.
6. Bake for 35 minutes or until the top is golden brown and a toothpick comes out clean.
7. Allow the cake to cool before serving. Dust with powdered sugar for an elegant finish!
Want to switch things up? You can substitute the sour cream with Greek yogurt for a healthier twist.
This cake is perfect for birthdays, potlucks, or simply as a sweet treat for yourself. Enjoy the rich flavors and the compliments that will surely come your way!
Cherry Pie Filling Sour Cream Cake
Editor’s Choice

Pyrex Deep 9×13-Inch Glass Baking Dish with Lid, Deep Casserole Dish, Gl…
 AmazonGBP 21.42
Hamilton Beach 6-Speed Electric Hand Mixer with Whisk, Traditional Beate…
 Amazon$27.95
365 by Whole Foods Market, Organic Powdered Sugar, 24 Ounce
 Amazon$5.79
22. Cherry Pie Filling Oatmeal
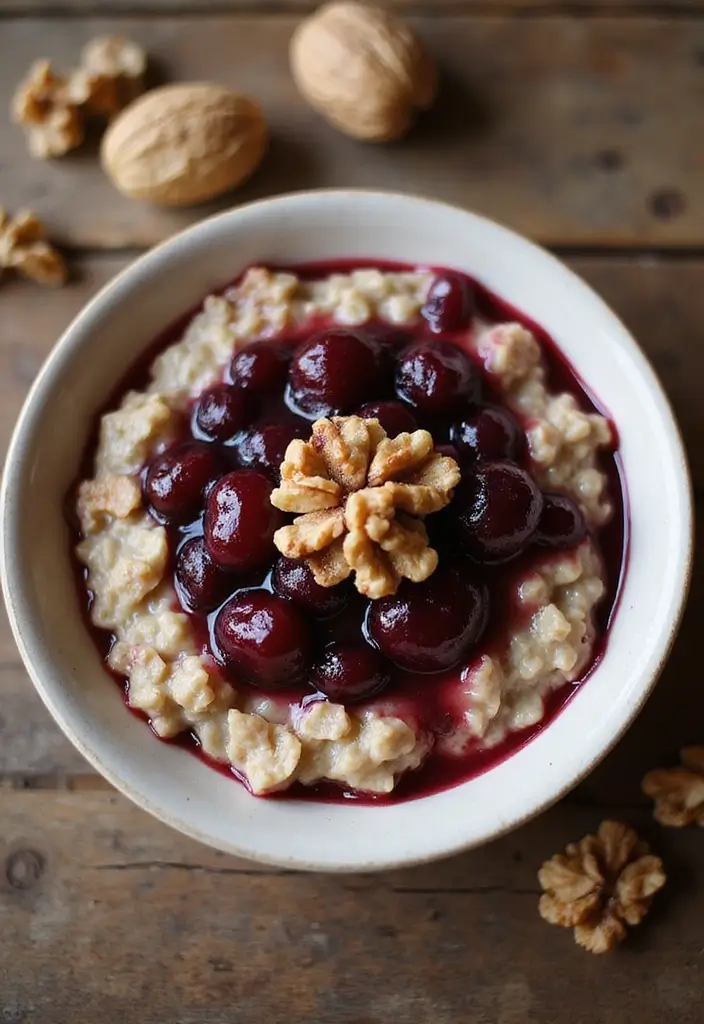
Start your day with a bowl of Cherry Pie Filling Oatmeal! This breakfast transforms ordinary oatmeal into a delightful cherry treat. It’s quick to make and packed with flavor and nutrients. Plus, the sweet cherry topping makes each bite feel like a special occasion.
Recipe Overview:
– Servings: 2
– Prep Time: 5 minutes
– Cook Time: 5 minutes
– Total Time: 10 minutes
– Calories: 180 per serving
Nutrition Information:
– Total Fat: 5g
– Cholesterol: 0mg
– Sodium: 40mg
– Total Carbohydrates: 30g
– Sugars: 15g
Ingredients:
– 1 cup rolled oats
– 2 cups water or milk
– 1/2 cup cherry pie filling
– Sweetener of your choice (honey, brown sugar, etc.)
Step-by-Step Instructions:
1. In a medium saucepan, bring your water or milk to a boil.
2. Stir in the rolled oats and lower the heat to a simmer.
3. Cook for about 5 minutes, stirring occasionally, until creamy.
4. Serve your oatmeal topped with cherry pie filling and add your favorite sweetener.
Want a little crunch? Add nuts or seeds for extra flavor and texture. It’s an easy way to make your breakfast even more satisfying!
FAQs:
– Can I use instant oats? Yes! Just adjust the cooking time based on the package instructions.
This Cherry Pie Filling Oatmeal is perfect for busy mornings. It’s a simple way to enjoy something special without spending hours in the kitchen. So why not treat yourself today?
Cherry Pie Filling Oatmeal
Editor’s Choice

Quaker Old Fashioned Rolled Oats, Non GMO Project Verified, Two 64oz Bag…
 Amazon$7.03
GERBS Super 5 Seed Snack Mix 2 LBS. Premium Grade | Top 14 Food Allergy …
 AmazonCheck Price
23. Cherry Pie Filling Pudding
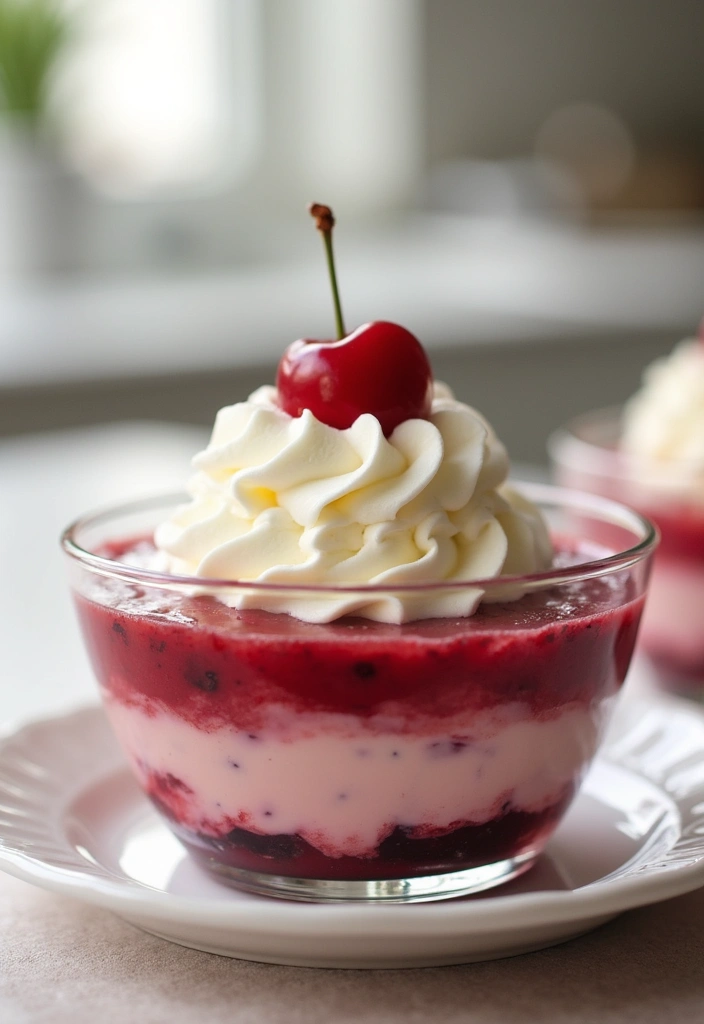
Indulge in the cozy goodness of Cherry Pie Filling Pudding! This simple dessert brings a delightful twist to your table. Imagine the creamy texture of pudding combined with the sweet-tart burst of cherries. It’s a treat that wraps up any meal perfectly, satisfying both kids and adults alike.
Recipe Overview:
– Servings: 4 servings
– Prep Time: 5 minutes
– Cook Time: 10 minutes
– Total Time: 15 minutes
– Calories: 220 per serving
Nutrition Information:
– Total Fat: 7g
– Cholesterol: 20mg
– Sodium: 90mg
– Total Carbohydrates: 35g
– Sugars: 18g
Ingredients:
– 2 cups milk
– 1/2 cup granulated sugar
– 1/3 cup cornstarch
– 1 tsp vanilla extract
– 1 can cherry pie filling
Step-by-Step Instructions:
1. In a medium saucepan, mix the sugar and cornstarch together.
2. Slowly pour in the milk, stirring well to combine. Cook over medium heat, stirring constantly, until the mixture thickens.
3. Once thickened, remove from heat and stir in the vanilla extract for extra flavor.
4. In dessert cups, layer the creamy pudding with dollops of cherry pie filling.
5. Chill the cups in the refrigerator for at least 30 minutes before serving.
Don’t forget to top with whipped cream for a dreamy finish!
FAQs:
– Can I use almond milk? Yes, feel free to swap for a dairy-free version!
– How can I make it sweeter? Adjust the sugar to your taste before cooking!
This Cherry Pie Filling Pudding is not just a dessert; it’s a delightful experience that brings warmth and joy. Enjoy making it for family gatherings or a cozy night in!
Cherry Pie Filling Pudding
Editor’s Choice

Comstock, More Fruit, Cherry Pie Filling & Topping, 21oz Can (Pack of 4)
 AmazonCheck Price
Clabber Girl Non-GMO Corn Starch, Gluten Free, 6.5 Ounce
 Amazon$1.53
5oz Plastic Dessert Cups with Lids and Spoons, Clear Yogurt Parfait Cups…
 Amazon$9.97
24. Cherry Pie Filling Salad
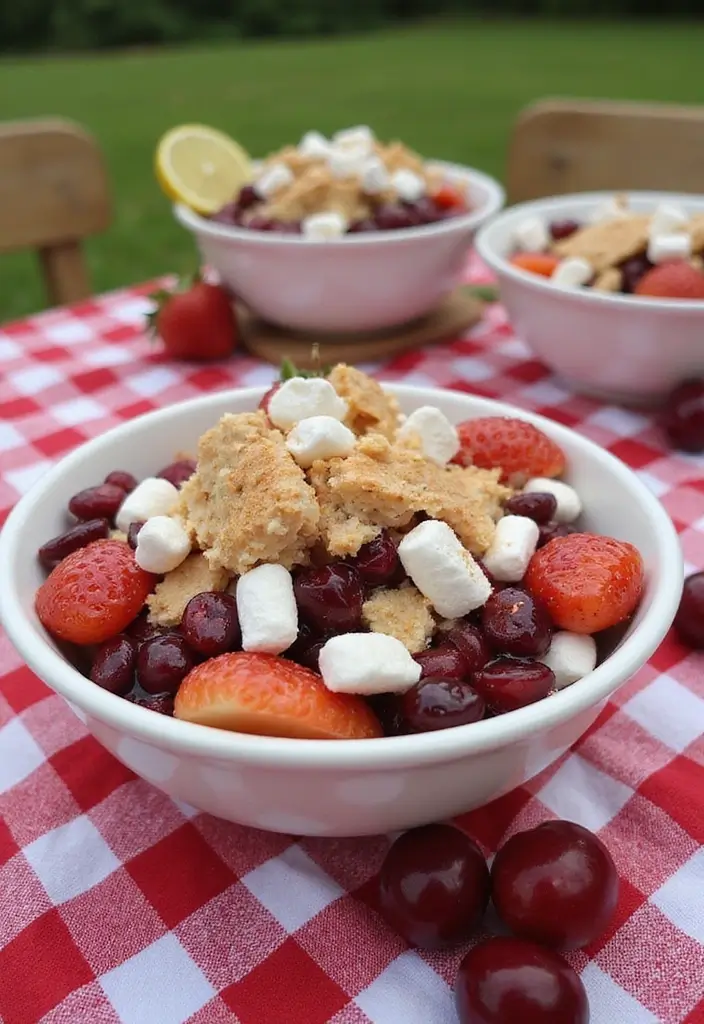
Looking for a delightful and unique side dish? Try making a Cherry Pie Filling Salad! This sweet treat is not just a salad; it’s a crowd-pleaser perfect for potlucks, picnics, or family gatherings. The mix of juicy cherries, fluffy marshmallows, and fresh fruit creates a refreshing burst of flavor that complements any meal. Plus, it’s incredibly easy to make, so you’ll have more time to enjoy your get-togethers.
Prepare this salad in just a few minutes. You’ll need a can of cherry pie filling, mini marshmallows, whipped topping, and your choice of fresh fruit. Chill it for a bit, and you’ll have a creamy, dreamy dish that everyone will rave about.
Here’s how to whip it up:
Ingredients:
– 1 can cherry pie filling
– 1 cup mini marshmallows
– 1 cup whipped topping
– 1 cup chopped fresh fruit (like apples or bananas)
Instructions:
1. In a large bowl, mix the cherry pie filling, mini marshmallows, whipped topping, and your chopped fruit together.
2. Stir gently until everything is well combined.
3. Cover and chill in the refrigerator for at least 30 minutes before serving.
Feel free to experiment with different fruits! You can use strawberries, peaches, or whatever you have on hand. This salad not only tastes great, but it’s also visually appealing with its bright colors.
FAQs:
– Can I use sugar-free whipped topping? Yes, that works perfectly!
Get ready to impress your guests with this easy and delicious Cherry Pie Filling Salad! It’s sweet, creamy, and sure to be a hit at your next gathering. Enjoy!
Cherry Pie Filling Salad
Editor’s Choice

Comstock, More Fruit, Cherry Pie Filling & Topping, 21oz Can (Pack of 4)
 AmazonCheck Price

25. Cherry Pie Filling Stuffed Peppers
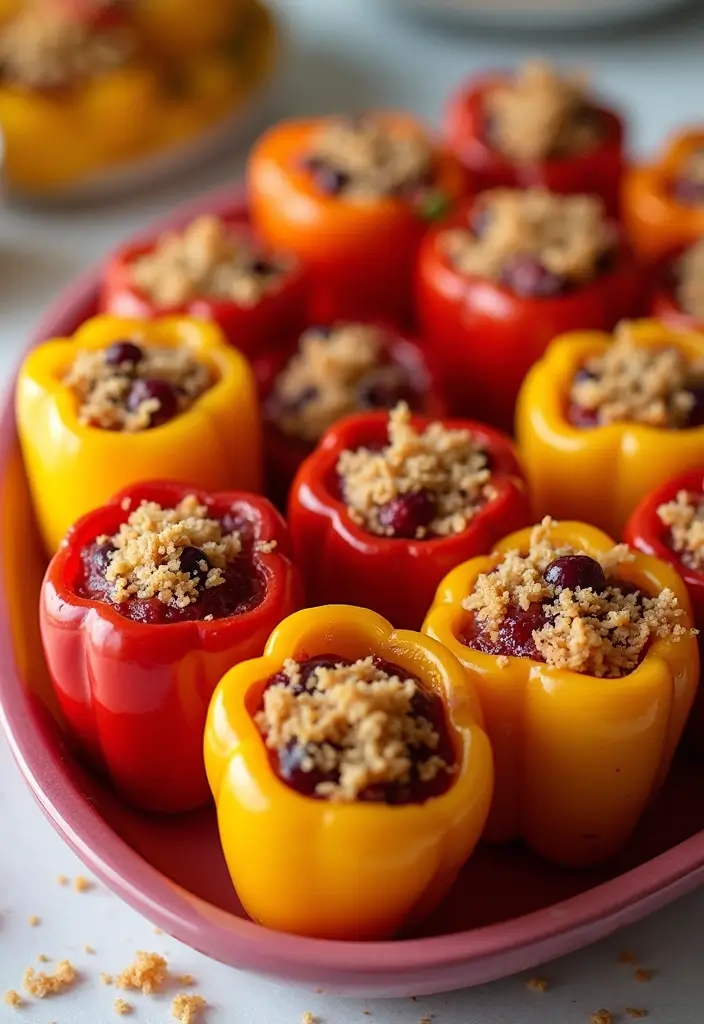
Are you ready to surprise your guests with a fun and colorful dessert? Try making Cherry Pie Filling Stuffed Peppers! These mini bell peppers filled with sweet cherry pie filling add a delightful twist to your dessert table. Their vibrant colors and unexpected flavors make them a hit at parties, and they’re easy to whip up.
Here’s what you need to know:
Recipe Overview:
– Servings: 12 peppers
– Prep Time: 15 minutes
– Cook Time: 10 minutes
– Total Time: 25 minutes
– Calories: 80 per pepper
Nutrition Information:
– Total Fat: 2g
– Cholesterol: 0mg
– Sodium: 50mg
– Total Carbohydrates: 16g
– Sugars: 12g
Ingredients:
– 12 mini bell peppers
– 1 can cherry pie filling
– 1/4 cup cream cheese, softened
– 1/4 cup whipped topping
Step-by-Step Instructions:
1. Preheat your oven to 350°F (175°C).
2. Cut the tops off the mini bell peppers and remove the seeds.
3. In a mixing bowl, combine the cherry pie filling with softened cream cheese and whipped topping. Stir until smooth.
4. Stuff each mini pepper with the cherry mixture, packing it gently. Place them on a baking dish.
5. Bake in the oven for about 10 minutes, until the peppers are warmed through.
6. Serve these tasty treats warm. For an extra touch, drizzle with chocolate before serving!
Tips:
– Use larger peppers for a bigger bite. Just remember to adjust the baking time.
– Experiment with toppings! Add some crushed nuts for crunch or a sprinkle of cinnamon for warmth.
These Cherry Pie Filling Stuffed Peppers will not only satisfy your sweet tooth but also showcase your creativity. They’re perfect for sharing with friends and family or even enjoying as a unique after-dinner treat. Enjoy the smiles when you serve them!
Cherry Pie Filling Stuffed Peppers
Editor’s Choice


Comstock, More Fruit, Cherry Pie Filling & Topping, 21oz Can (Pack of 4)
 AmazonCheck Price
Kraft Philadelphia Original Cream Cheese Pouches (50 Pack)
 Amazon$41.50
26. Cherry Pie Filling Infused Water

Stay cool and refreshed with a delightful twist on hydration: Cherry Pie Filling Infused Water! This easy recipe not only brightens your drink but also adds a burst of fruity flavor that’s perfect for summer parties or your daily hydration routine. Imagine sipping on a glass of this vibrant drink, feeling both quenched and satisfied.
Recipe Overview:
– Servings: 4
– Prep Time: 5 minutes
– Total Time: 5 minutes
– Calories: 10 per serving
Nutrition Information:
– Total Fat: 0g
– Cholesterol: 0mg
– Sodium: 0mg
– Total Carbohydrates: 2g
– Sugars: 2g
Ingredients:
– 4 cups of water
– 1/2 cup of cherry pie filling
– Ice cubes (optional)
How to Make It:
1. In a pitcher, mix the water and cherry pie filling together.
2. Stir the mixture well to blend the flavors.
3. Let it chill in the refrigerator for at least 30 minutes.
4. Serve it cold, adding ice cubes if you like.
Tips to Elevate Your Drink:
– Add slices of lemon or fresh mint for an extra refreshing kick.
– Use sparkling water instead of still for a fizzy sensation.
FAQs:
– How long can I store this drink? Enjoy it within 2 days for the best taste and freshness.
Cherry Pie Filling Infused Water is not just any drink; it’s a fun way to stay hydrated while enjoying the flavors of summer. It’s simple, affordable, and oh-so-refreshing! Perfect for family gatherings or just a little self-care at home. Cheers to delicious hydration!
Fun fact: Cherry Pie Filling Infused Water clocks in at just 10 calories per serving and a 5-minute prep, one of the easiest recipes with cherry pie filling to try. Swap sugary drinks for this vibrant, refreshing hydration—it’s dessert-flavored, yet light enough for daily sips.
Cherry Pie Filling Infused Water
Editor’s Choice

Zulay Fruit Infuser Water Bottle – 34oz – Leakproof With Full-Length Inf…
 Amazon$9.99
SodaStream – Terra Sparkling Water Maker | VALUE BUNDLE | CQC CO2 system…
 Amazon$149.99
Bivvclaz 2 Liter 68 oz Glass Pitcher with Lid and Handle, Glass Carafe f…
 Amazon$16.97
27. Cherry Pie Filling Breakfast Parfait
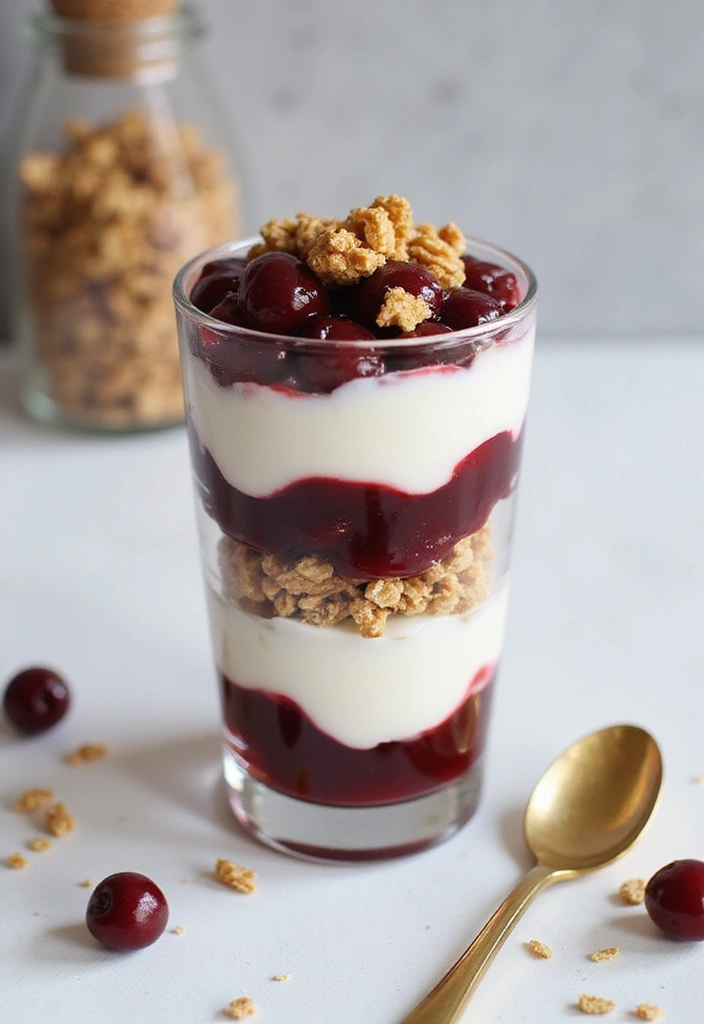
Kickstart your morning with a Cherry Pie Filling Breakfast Parfait that’s both easy to make and utterly delicious! Imagine creamy yogurt layered with crunchy granola and sweet cherry pie filling. It’s like enjoying dessert for breakfast, but in a healthy way! This parfait is perfect for busy mornings when you need a quick, nutritious meal that still feels special.
You can whip this up in just five minutes. It’s a great way to enjoy those wonderful cherry pie flavors without the fuss of baking. And the best part? You can customize it to your taste, making it a fun and versatile breakfast option.
Recipe Overview:
– Servings: 2 servings
– Prep Time: 5 minutes
– Total Time: 5 minutes
– Calories: 190 per serving
Nutrition Information:
– Total Fat: 5g
– Cholesterol: 10mg
– Sodium: 50mg
– Total Carbohydrates: 30g
– Sugars: 15g
Ingredients:
– 1 cup yogurt (vanilla or plain)
– 1/2 cup granola
– 1 can cherry pie filling
Step-by-Step Instructions:
1. Grab two serving bowls or glasses.
2. Start with a layer of yogurt at the bottom.
3. Add a layer of granola on top of the yogurt.
4. Spoon cherry pie filling over the granola.
5. Repeat the layers until the bowls are full.
6. Serve immediately and enjoy your delightful breakfast!
Pro Tip: Want to mix it up? Swap granola for your favorite nuts or seeds for an extra crunch!
FAQs:
– Can I use frozen cherries? Absolutely! Just thaw them out and drain any extra juice before layering them into your parfait.
Enjoy this Cherry Pie Filling Breakfast Parfait as a quick, sweet start to your day. It’s not just breakfast; it’s a treat that fuels you for whatever comes next!
Cherry Pie Filling Breakfast Parfait
Editor’s Choice

Ultimate Probiotic Yogurt Maker with Adjustable Time & Temp Control – Ma…
 Amazon$71.95
KIND Healthy Grains Clusters, Granola Variety Pack, Healthy Snacks, Good…
 Amazon$14.04
Pyrex Sculpted (3-Pack) Glass Mixing Bowls Set With Lids For Prepping, B…
 Amazon$27.57
28. Cherry Pie Filling Breakfast Bowl
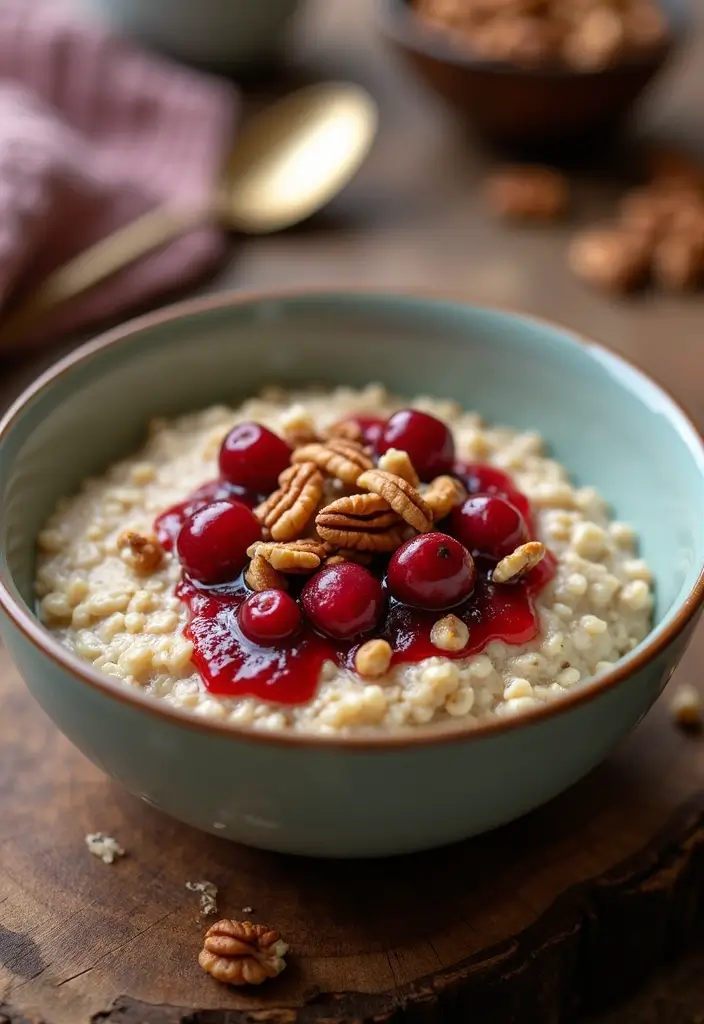
Start your day right with a delightful Cherry Pie Filling Breakfast Bowl! This tasty dish combines creamy oatmeal with sweet cherry pie filling, making breakfast both satisfying and fun. You can add your favorite toppings like crunchy nuts or hearty seeds for extra flavor and nutrition. This easy recipe is perfect for busy mornings when you want something quick yet delicious.
Ready for the details? Here’s what you need:
Recipe Overview:
– Servings: 2
– Prep Time: 5 minutes
– Cook Time: 5 minutes
– Total Time: 10 minutes
– Calories: 200 per serving
Nutritional Information:
– Total Fat: 6g
– Cholesterol: 0mg
– Sodium: 50mg
– Total Carbohydrates: 35g
– Sugars: 15g
Ingredients:
– 1 cup rolled oats
– 2 cups water or milk
– 1/2 cup cherry pie filling
– Toppings of your choice (nuts, seeds, or even granola)
Step-by-Step Instructions:
1. In a medium saucepan, bring the water or milk to a boil.
2. Add the rolled oats and reduce the heat to a simmer. Cook for about 5 minutes until the oats are soft and creamy.
3. Spoon the oatmeal into bowls and top with the cherry pie filling. Add your favorite nuts or seeds for that perfect crunch!
Want a creamier texture? Try using milk instead of water; it makes a big difference! Plus, you can customize this bowl every day.
FAQs:
– Can I use instant oats? Yes, just adjust the cooking time based on the package instructions.
– Can I make this ahead? Absolutely! Prepare the oatmeal, and store it in the fridge. Just heat it up in the morning and add your toppings.
This breakfast bowl is not only a treat for your taste buds but also a visually appealing way to start your day. Enjoy the cozy flavors and feel good about fueling your body with this wholesome meal!
Cherry Pie Filling Breakfast Bowl
Editor’s Choice

Quaker Old Fashioned Rolled Oats, Non GMO Project Verified, Two 64oz Bag…
 Amazon$7.03
Southern Style Nuts Gourmet Hunter Bulk Trail Mix, 23 oz (Pack of 1), Se…
 Amazon$7.64
HOTEC BPA Free Unbreakable Wheat Straw Cereal Bowls – Microwave & Dishwa…
 Amazon$11.99
29. Cherry Pie Filling Fritters

Imagine sinking your teeth into a warm, crispy fritter bursting with sweet cherry goodness. That’s exactly what you get with these Cherry Pie Filling Fritters! Perfect as a dessert or a delightful snack, these treats are even better when dusted with powdered sugar. They’re simple to whip up, making them a must-try for any cherry lover!
Recipe Overview:
– Servings: 12 fritters
– Prep Time: 15 minutes
– Cook Time: 15 minutes
– Total Time: 30 minutes
– Calories: 150 per fritter
Nutrition Information:
– Total Fat: 6g
– Cholesterol: 10mg
– Sodium: 50mg
– Total Carbohydrates: 25g
– Sugars: 8g
Ingredients:
– 1 cup all-purpose flour
– 1 tbsp sugar
– 1/2 tsp baking powder
– 1/4 tsp salt
– 1 egg
– 1/2 cup milk
– 1 can cherry pie filling
– Oil for frying
– Powdered sugar for dusting
Step-by-Step Instructions:
1. In a medium bowl, combine the flour, sugar, baking powder, and salt.
2. In a separate bowl, whisk the egg and milk together until smooth.
3. Mix the wet ingredients into the dry ingredients until fully combined.
4. Heat oil in a frying pan over medium heat.
5. Drop spoonfuls of batter into the oil, adding a small spoonful of cherry pie filling in the center of each.
6. Fry until golden brown, then remove and drain on paper towels.
7. Dust with powdered sugar before serving.
Serve them warm for an unbeatable flavor experience! These fritters are not only delicious but also versatile. You can even bake them if frying isn’t your thing—just adjust the cooking time and temperature. Enjoy these treats at your next gathering or indulge in a cozy night at home!
• Try different fillings for a fun twist
• Pair with ice cream for an extra treat
• Make them smaller for bite-sized snacks
• Experiment with spices like cinnamon for added flavor
Cherry Pie Filling Fritters
Editor’s Choice

Amazon Grocery, Unbleached All Purpose Flour, 5 Lb (Previously Amazon Fr…
 AmazonCheck Price
365 by Whole Foods Market, Organic Powdered Sugar, 24 Ounce
 Amazon$5.79
Conclusion
With these 29 recipes that highlight cherry pie filling, you have a treasure trove of delightful treats at your fingertips! Each recipe brings its unique flair, ensuring that you’ll satisfy your sweet cravings in style.
Whether you’re baking for a special occasion, a family gathering, or just to treat yourself, these cherry dessert recipes are sure to impress. Don’t hesitate to mix and match, experiment, and create your own cherry-inspired masterpieces in the kitchen!
Note: We aim to provide accurate product links, but some may occasionally expire or become unavailable. If this happens, please search directly on Amazon for the product or a suitable alternative.
This post contains Amazon affiliate links, meaning I may earn a small commission if you purchase through my links, at no extra cost to you.
Frequently Asked Questions
What Are Some Easy Cherry Pie Recipes I Can Make?
If you’re looking for easy cherry pie recipes, you’re in for a treat! You can whip up a classic cherry pie using pre-made pie crusts and cherry pie filling for a quick dessert. Or try a cherry cobbler by topping the filling with biscuit dough and baking until golden. Another fun option is cherry turnovers, where you can fill puff pastry with cherry pie filling for a delightful handheld treat!
How Can I Use Cherry Pie Filling in Baking Beyond Pies?
Cherry pie filling is incredibly versatile! You can use it in cherry desserts like layered cakes, where you alternate cake layers with cherry filling and whipped cream. It also works wonderfully in muffins and pancakes for a fruity twist. Consider making a cherry cheesecake or using it as a topping for ice cream to elevate your dessert game!
What Are Some Creative Cherry Pie Filling Ideas?
Get ready to be inspired by some creative cherry pie filling ideas! How about making a cherry chocolate chip cookie bar? Just mix the filling into your cookie batter for a sweet surprise. You could also try a no-bake cherry cheesecake using cherry filling as the topping. For a breakfast treat, incorporate it into yogurt parfaits or oatmeal for a delightful start to your day!
Can I Make Cherry Desserts Ahead of Time?
Absolutely! Many cherry dessert recipes can be made ahead of time. For instance, cherry pies can be assembled and frozen before baking, allowing you to have a fresh pie ready for any occasion. Similarly, desserts like cherry trifle or cobbler can be prepared a day in advance and stored in the fridge, just be sure to add fresh toppings before serving for that bakery-perfect look!
What Tips Do You Have for Baking with Cherry Filling?
When baking with cherry filling, here are some handy tips! First, always drain excess liquid from the filling to prevent a soggy crust. If you’re making a pie, consider adding a bit of cornstarch to thicken the filling. Also, don’t shy away from enhancing the flavor—adding a splash of almond extract or a sprinkle of cinnamon can elevate your dessert beautifully. Lastly, brush your crust with an egg wash for that golden, bakery-perfect finish!
Related Topics
cherry dessert recipes
easy cherry pie recipes
baking with cherry filling
cherry pie filling ideas
quick desserts
beginner friendly
holiday baking
fruit desserts
no-bake cherry recipes
cherry recipes for baking
bakery-style desserts
simple cherry treats

